Brain & Behaviour Lab
Welcome to the Brain & Behaviour labs at the VU! This site contains all info you need to run an experiment in this lab.
If you want to contribute info on this website let us know by sending an email to: c.cengiz@vu.nl
- Guide to this Book!
- Introduction to the Lab
- Lab Workflow
- Lab Equipment
- Behavioural Cubicles
- Eye-Tracking
- EEG
- Multicubicles
- Useful Documents
Guide to this Book!
This website works in a different way than the old Brain & Behaviour information website. Here we explain how and give tips on how to navigate it well.
The structure is quite intuitive. You have books - in this case the "Brain & Behaviour Lab"; books have chapters and chapters have pages. Most detailed information is written on a page and every page has an "Attachments" section to the left side. These are attachments that are downloadable for public users.
Introduction to the Lab
Here you can find basic information about the lab
Entrance to the Lab
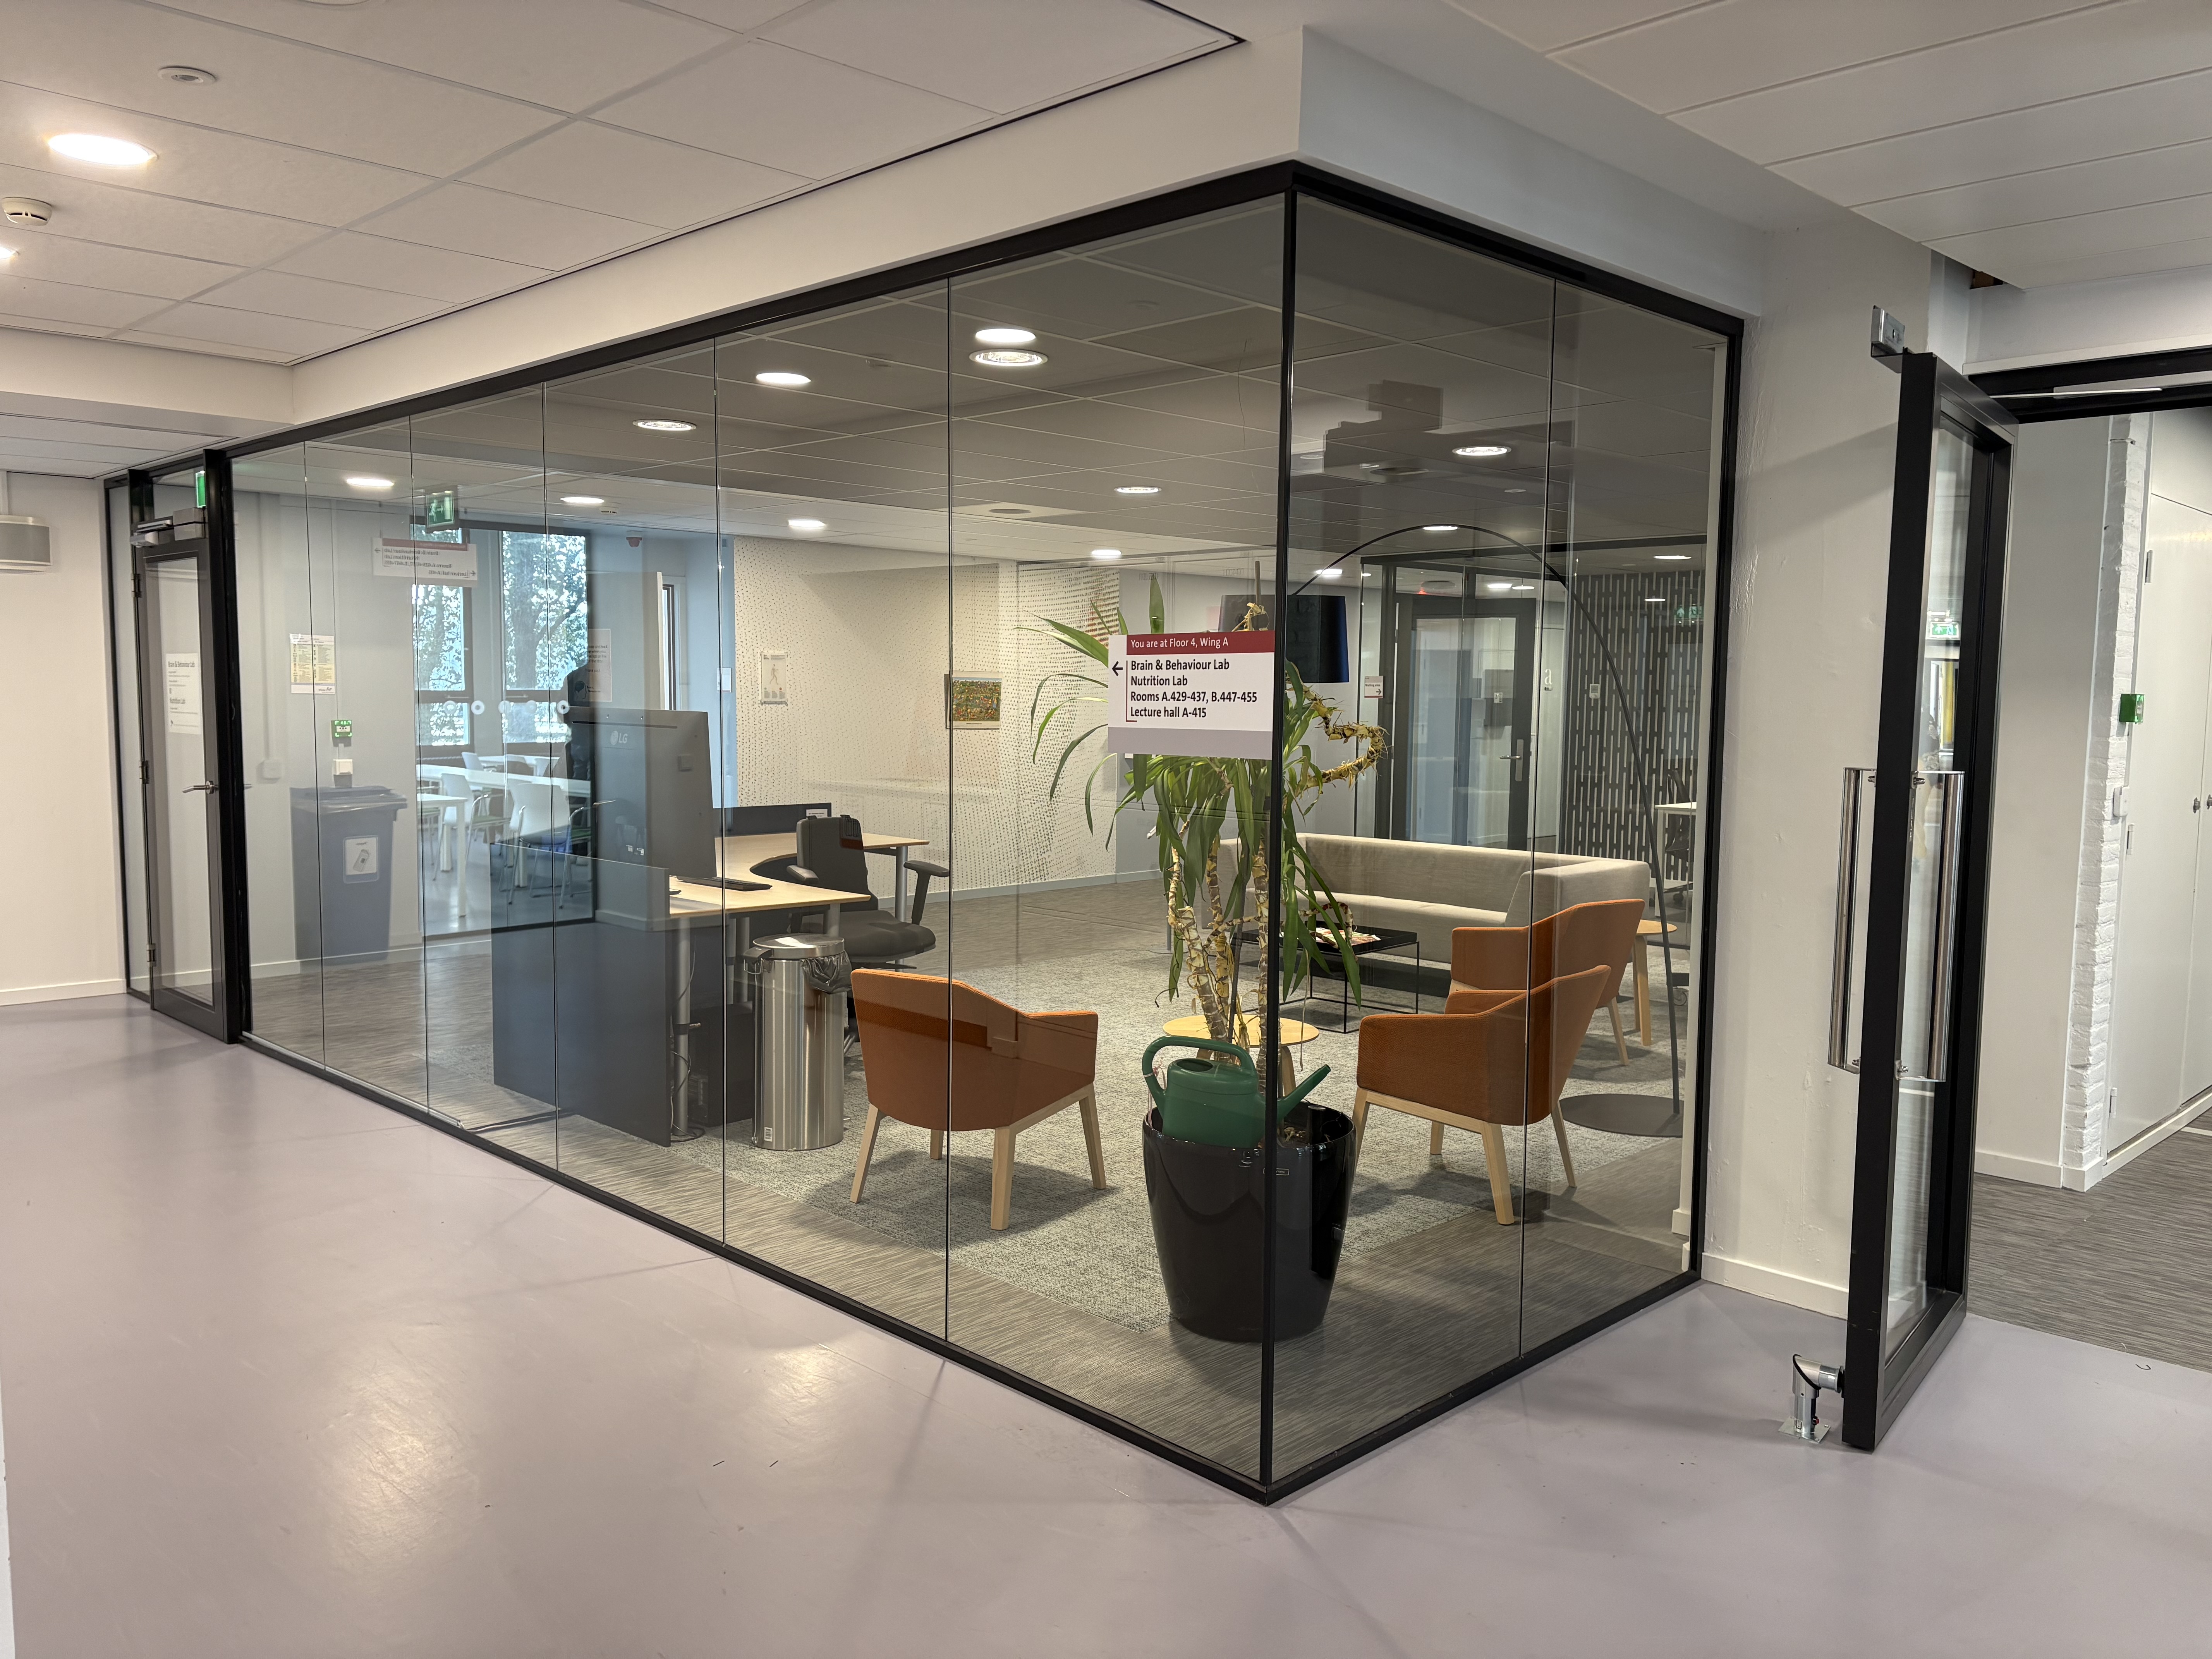
The Brain & Behaviour Lab is located on the 4th floor of the MF-building (A-wing). The easiest way to find it is to take the stairs or elevator located at the front entrance of the MF-building. When you are on the 4th floor, take the hallway that takes you to the A-wing. The entrance to the lab is the first room that you find on your left-hand side, with glass walls:
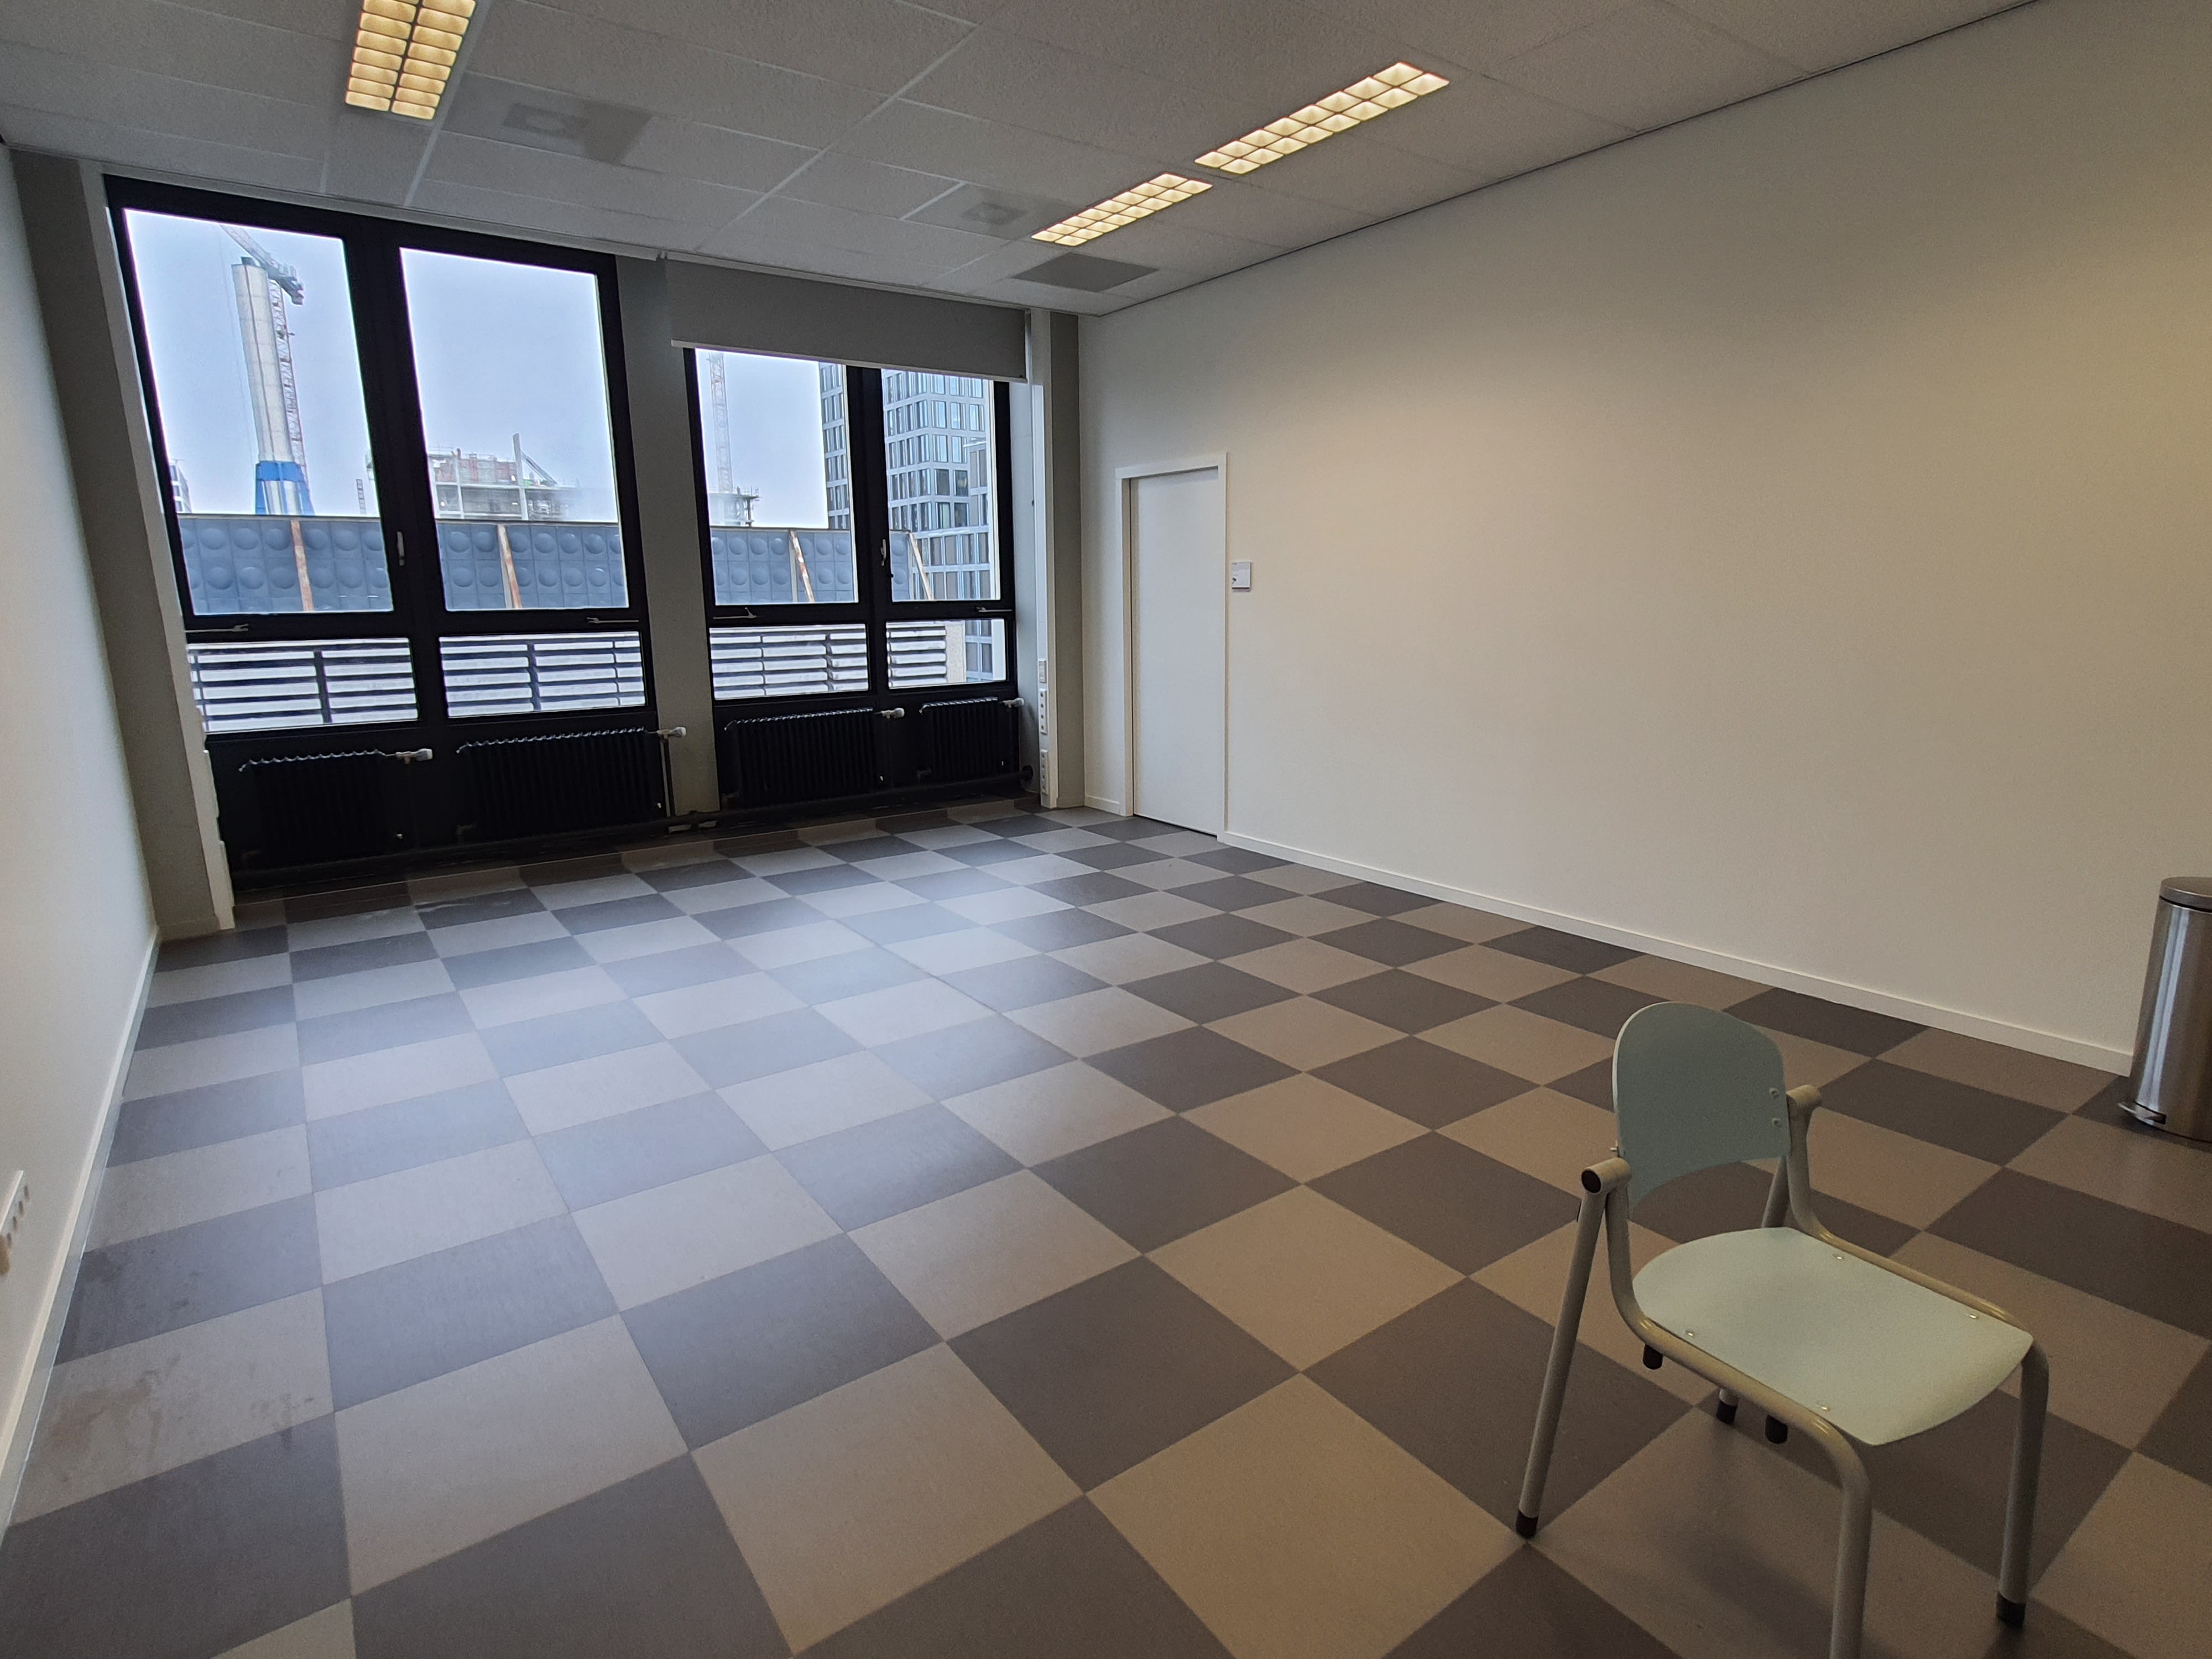
The door is open from 09:00 to 17:00 on weekdays. If you want to enter outside of this time window, you need a [LINK TO KEYCARD PAGE]. After entering, you will see the waiting area (MF A-431):
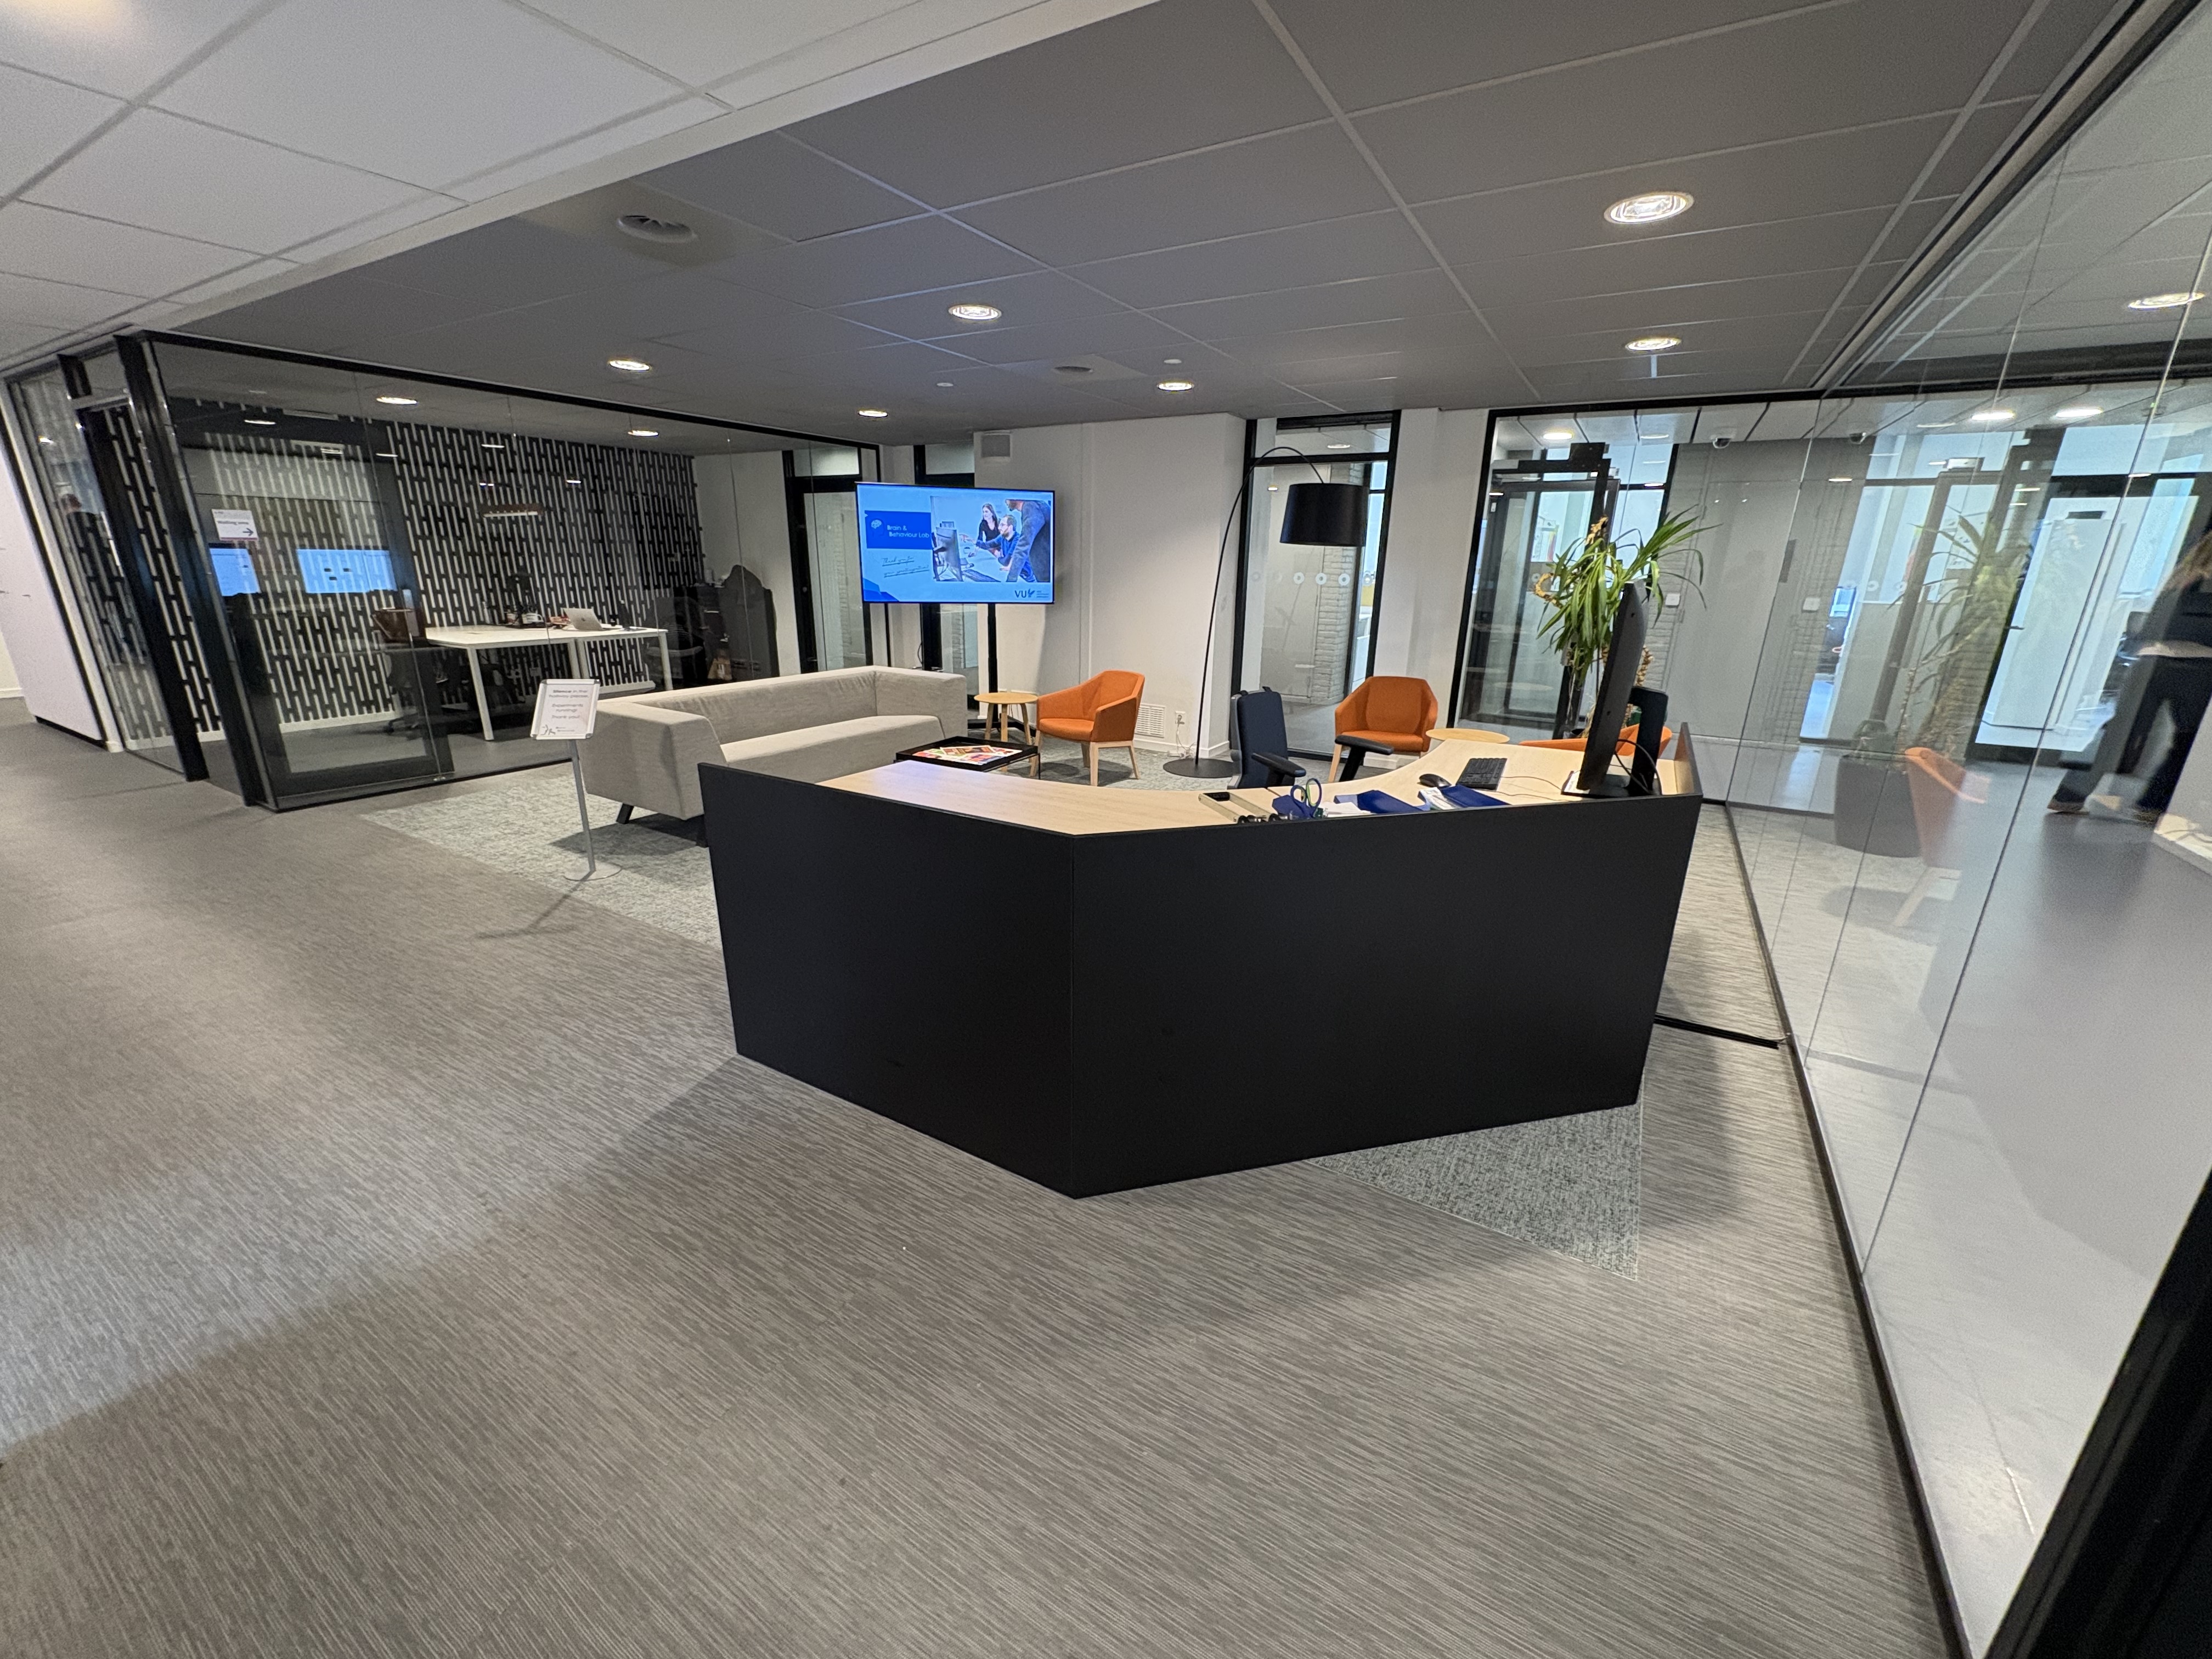
Participants can wait here until the researcher comes and accompanies them to their lab. When advertising your experiment on Sona or elsewhere, we advise you to mention the room number of this waiting area (MF A-431) in addition to the name "Brain & Behaviour Lab". If you just mention the room that you are using for your experiment, for example B-449a, it will be harder for participants to find. This is because most rooms are located in the back of the lab.
Rooms Explained & Floor Plan
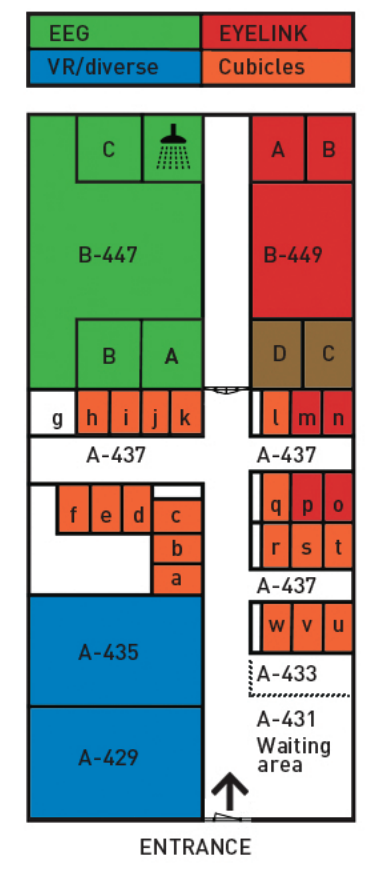
The lab contains rooms that are part of both the A-wing and the B-wing. All 3 rooms starting with B-447 (a, b, & c) are EEG labs and all 4 rooms starting with B-449 (a, b, c, & d) are eye tracking labs. However, both spaces (B-447 & B-449) are equipped with eye-tracking as well as EEG devices. This means that it is possible to use any of the options in any of these labs. The divide of the labs is mainly due to the fact that EEG equipment such as electrodes, caps, gels, etc., is located in B-447. We also have a shower for participants to use (B-447d).
If you cannot find an EEG device in any of the B-449 rooms, then you can usually find this in the supply closet in the back of space B-447. If it is also not there, contact the Lab Coordinator.
All rooms starting with A-437 (a - w) are behavioural cubicles. These are one-person spaces that can be controlled via a central computer or locally, see [LINK TO CUBICLE CONTROLLER]. You do not have to book these cubicles if you want to use them. The rooms A-437m/A-437n and A-437o/A-437p are exceptions to this. They are eye-tracking cubicles (without EEG) and must be booked to be used.
Rooms A-429 & A-435 are known as VR-rooms or Multicubicles. They are flexible and spacious. Most of the time, they are used for VR studies. However, they can also be used for other experiments. If you would like to use these rooms for a longer time, contact the Lab Coordinator. In addition to these rooms, we have 3 more multi purpose rooms in the C-wing: C470 and C477 & C479. C477 & C479 generally work in tandem, but can be booked separately. One is a large open room (Observation Room; C479) that can be observed through the other room (Control Room; C477). All of the these Multicubicles can be used in a variety of ways. To make use of these rooms, you can contact the Lab Coordinator.
Floor Plan
Here is the Floor Plan for the Brain & Behaviour Lab. You can download the Floor Plan here: FloorPlanBBL.pdf
Shared Mail List
People
Here you find the contact details from staff running the lab. If you have questions about something you can contact the people below.
Lab Coordinator
- Cemre Cengiz
E-mail: c.cengiz@vu.nl
Phone: +31 6 42446967 (For urgent matters only)
Room: A-433 (MF-building)
Technical Support
- Quinten Madari
E-mail: q.s.r.madari@vu.nl
Room: C-680 (MF-building) - Gert Faber
E-mail: g.s.faber@vu.nl
Room: C-680 (MF-building) - Saori Mita
E-mail: s.mita@vu.nl
Room: C-680 (MF-building)
Lab Manager
- Freek van Ede
E-mail: freek.van.ede@vu.nl
You can also send a mail to bblabs.fgb@vu.nl. Multiple people are able to see your e-mail and respond.
Lab Workflow
In this chapter you can find the general workflow and steps to follow when setting up and running experiments in the Brain & Behaviour Lab. Please go over the steps one by one when setting up a new study.
Pre Experiment
Ethics in Research
- Check the privacy rules on this website.
- You should submit a data management plan to the Research and Policy Support (REPS) Team (research.data.fgb@vu.nl). You can find more information on this website.
- Research has to comply with the code of ethics for research at the FGB (NETHICS), which can be found on this website.
- With regards to ethical approval, an umbrella ethics application for standard cognitive experiments in the lab - including online experimenting and VR - has been approved by the Ethical Review Board (VCWE) in September 2021 and is valid for 5 years. If you are a researcher in the section Cognitive Psychology and your research does not deviate from this protocol , you do not need to request separate approval. In this case, you can use the approved consent form and information letter templates and add study-specific information. With regards to the information letter, you can use this document to add method-specific text.
- If you are not a researcher working in the section Cognitive Psychology and/or for any deviations from the standard protocol, you can apply for an amendment at the VCWE. You then upload this protocol and explain what you will add/do differently. In case your research deviates hugely you need to get your own research protocol approved by VCWE. To prepare a new ethics application, you can find participant-information-letter-template and informed-consent-templates and a GDPR checklist on this website .
Request a Project Account
To run experiments in the lab and use the lab computers, you should request a project account. This can be requested by sending an email to the Lab Coordinator(c.cengiz@vu.nl) or to bblabs.fgb@vu.nl. Each new project requires a new account. This means that if you want to start a different project, you need to request a new project account. This project account can be used by multiple people working on the same project. With this research account you can log into every computer at the VU Brain & Behaviour lab. You can also log into different PCs at the same time. The steps for requesting an account:
- Send an e-mail to the Lab Coordinator or bblabs.fgb@vu.nl that you would like to have a new project account.
- You will receive a response mail with a link to a form for filling out information.
- Once you filled in the form, send a response that you have filled the form in along with a password of minimum 7 characters.
- You will receive a confirmation mail with your username/Short Project Name and your password. You can now use it to log into the PCs.
Once you have your account, check out the Lab Help folder that everyone has on their desktop by default. Most of the software necessary is also present by default.
If you need anything in particular that is not on there already, contact the Lab Coordinator or anyone else from the Lab Team. Do this in a timely manner!
For more detailed information about (default) project accounts, check the page on Project Accounts.
Lab Access
If you do not have access to the lab on your VU employee card, then you can request this at the TO3 Helpdesk. The room number is B-659 (MF-builing, sixth floor). Opening hours of the TO3 Helpdesk are Monday-Thursday from 09:00 to 17:00 and on Friday from 09:00 to 16:00. Before you go there, discuss your access request with the Lab Coordinator since they need to approve it. Students cannot have lab access on their cards and need to request keycards for each booking (or the supervisor needs to request it for them via Labservant).
If at any time your access card is not working, try updating it by holding it against the lock at the front entrance of the lab. This may fix your problem. If the problem persists, visit the TO3 Helpdesk.
In the case of (student) research assistants, it is possible to request an employee access card through this link.
Access Outside Opening Hours
You will need to request additional access on your card and inform VU Security about when you would like to get access to the lab outside of the opening hours. The steps for requesting this access can be found in our Guideline .
Recruiting Participants
Participants can be recruited via walk-ins or via the online Sona system . You can also place brochures of your experiment in the waiting room of the Brain & Behaviour Lab (A-431) or on bulletin boards around VU Campus. Additionally, we also put links to studies in the Ongoing Studies section of this website. Previously, there was the option to use Telegram for recruiting participants; this option has been discontinued!
Sona
If you do not have a Sona-account yet, please contact subjectpool.fgb@vu.nl. After receiving a Sona-account, you can create a study on Sona with the available time slots and have people register for your research. Participants can apply for credits (1.5 per minute in the lab, or 1 per minute online) or for money (10 euros per hour). For more detailed information on participant handling please see the following manual (2024/2025.)
Reserving Lab Spaces
For making bookings and reservations of lab spaces, we make use of Labservant . Anyone from the FGB Department can make use of Labservant. It might be somewhat difficult to navigate so we have step-by-steps instructions on how to make a booking:
Check this document for the most up-to-date booking instructions and guidelines.
- Please open your browser, navigate to Labservant , and log in using your VU-ID credentials. Navigate to Lending Desk.
- In the Lending Desk, click on ‘+Create new booking’ in the right lower corner.

- Search for the room you need:
- If you write 'Brain' as a search term, you will see all the keycards AND rooms of the Lab.
- You can also just look up a specific room if you know which one you need.
- Multipurpose/VR labs can be found under the search term: 'Multicubicle'
- EEG labs can be found under the search term: 'B447'
- Eyelink labs can be found under the search term: 'B449'
*note that you can make use of both EEG/Eyelink in the rooms of B447 & B449

All rooms start with "EQ018... MF-...." (e.g., "EQ018159 MF-B447A EEG + Eyelink") and all keycards starts with "EQ017... Keycard MF-...." (e.g., "EQ017671 Keycard MF-B447 EEG-01").
Any room/keycard that does NOT start with "EQ01...." is old and invalid. Please pay attention to not select any of these!
-
Select the room, adjust the date and time and provide information of your booking. Make sure to select and fill out both the start and end times separately. In order to see your booking and availabilities you must move to your desired date manually using the arrows in black.
- Never make a booking spanning multiple days. If you want to make a booking for the same space and time period for consecutive days, then select "Recurrence: daily" under "Recurrence" period. You can also do this weekly, however the booking slots cannot differ and, generally, you may not make bookings of more than 2 weeks in advance unless otherwise discussed with the Lab Coordinator.
- Press submit > you will receive a mail if your booking has been approved or declined. If declined, you can read in the mail why it has been declined.
When booking a lab space, check whether you are booking the space/room and not (just) the Keycard for the room. If you only select the Keycard, the room will NOT be reserved!
Cancellation of Booking
Go to the home page > click on the shortcut to the lending desk > click on 'go to your booking overview' > click on the booking you want to delete (the text becomes bold, the booking is selected) > click on the 'edit' button in the bottom right corner > click on the 'delete' button in the bottom right corner.
Running Experiment
Participant Handling
Before the start of your experiment, you should inform your participants on the goals, terms and conditions of your research with an information letter (ENG /NL ). After this they should agree with participating in the research by signing the informed consent (ENG /NL ).
Overview Data Flow
For a general overview of the data flow when running an experiment see the following schematic. The next few paragraphs of this section will elaborate on the data flow.
Transfer Experiment Files > Project Account
In preparation of running your experiment, you have to transfer all needed experiment files to your research account beforehand.
For EEG and Eye-tracking Experiments
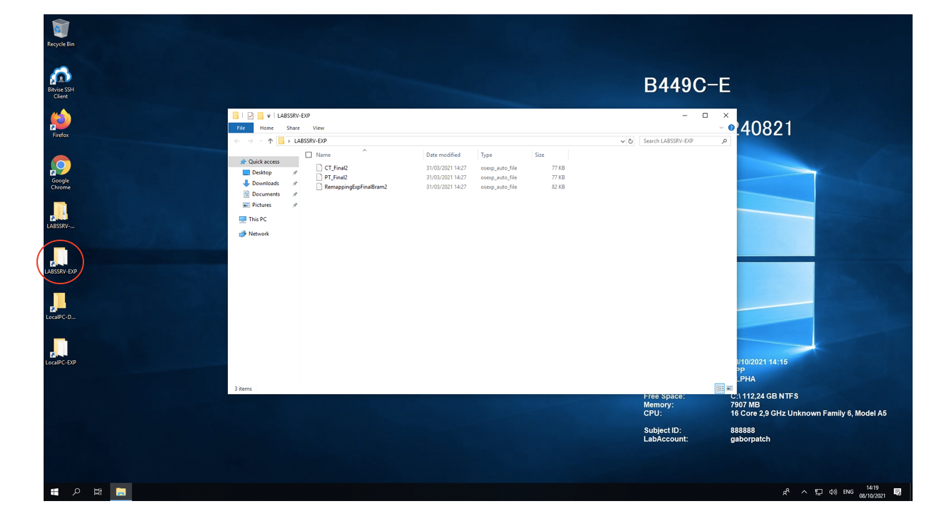
First, log into your research account (on any lab computer). Put all files that are needed for your experiment in the EXP folder on the server, found at \\labssrv1\labs\[Projectaccountname]\EXP.
For Behavioural Experiments
When running experiments in the behavioural cubicles, you have to create a new folder (e.g. "MyExperiment") within the \\labssrv1\labs\[Projectaccountname]\EXP folder. You place your experiment files in this new folder. If your project includes multiple experimental files (including images, textfiles or sound), place them together with the actual experiment inside of the "MyExperiment" folder.
Multiple separate experiments can be run sequently in the same run. For this, multiple folders are needed in \\labssrv1\labs\[Projectaccountname]\EXP. Folders will be automatically and sequentially opened during a session. This happens in alphabetical and numerical order. Thus, to create a specific play order you could for example use "01_MyFirstExperiment" and "02_MySecondExperiment" as folder names.
If you are planning on running experiments in the cubicles, please look at the cubicle manual for more detailed information about correctly setting up your project account and data management.
Starting Your Experiment
For EEG and Eye-tracking Experiments
Turn on all needed computers (Stimulus/EyeLink/BioSemi). Log into the stimulus computer with your research account. Every time you log in, all files from the \\labssrv1\labs\[Projectaccountname]\EXP folder will be copied to a local EXP folder. When running your experiment, it is important to use the version located in the LocalPC-EXP (desktop shortcut of local EXP folder).
Although the contents of \\labssrv1\labs\[Projectaccountname]\EXP and LocalPC-EXP should completely match after logging in, it is strongly advised to NOT run your experiment from the server. Any network problems can cause your experiment to crash, this will not pose a problem when running locally.
Furthermore, you should specify that your data should be stored in the LocalPC-DATA folder. If this is not possible, move the data there manually before logging off from the project account. When logging off, all files from the local DATA folder will be copied to the LABSSRV1-DATA folder on the server.
For Behavioural Experiments
See section Behavioural Cubicles.
Post Experiment
Participant Debriefing
When the participant is finished with the experiment, you can optionally give them a debriefing document (see example ).
If needed, there is a special room available for debriefing; you can make use of A-437G. This is a bigger space to discuss the experiment. If this is already full, you can use the Lab Coordinator's office when they are not there.
Data Management
After running the experiment, you can access the data on the server via any lab pc at \\labssrv1\labs\[Projectaccountname]\DATA. The data will be stored in folders in the following format: date[subjectnumber][pcnumber][time day].
It is also possible to access the data from your personal computer as long as you are connected to the VU-network via the VU-VPN.
On Windows, type in the file explorer: \\labssrv1.psy.vu.nl\labs\[Projectaccountname]\Data
On a Mac, open Finder -> Go -> Connect to Server and then write: smb://labssrv1.psy.vu.nl/labs/[Projectaccountname]/Data
On windows, you will be prompted to login with your project credentials: FPP\[Projectaccountname] and password. The same happens on a mac, but you can leave out the FPP\ and just enter the account name and password. When using a Linux based computer, the same steps can be followed within the Citrix work environment (https://apps.vu.nl/Citrix ). For more info on how to set this up see https://tinyurl.com/p9c98jch .
Participant Reimbursement
Participants can be rewarded with credits via Sona or with a payment. Payments can be done by filling out the online declaration form . To file a payment you will need a VU reference number for your project, which can be retrieved by contacting suzan.besuijen@vu.nl. In this form the BSN number of the participant and the WBS-number of the study are shown on the same page. Therefore, for safety and privacy reasons, please follow the following steps when using the online declaration form:
- Always have participants fill out the online declaration form while in the lab. NEVER share the link and study wbs information with participants via email to fill out at home.
- The researcher first fills out the Declaration section (e.g. the wbs information). Please make sure to under Short description (korte omschrijving) list the study name, and under Explanation (toelichting) list the name of the Principal Investigator (this way the budget holder has better insight in what they are approving).
- The researcher then clicks on the '-' shown on the top right to fold this section (rendering it invisible), before the participant fills out the rest of the form
- The participant then fills out the two top sections (Personal details and Bank information), while the researchers remains in the room but so that they cannot see the personal details entered on the computer screen
- The participant then submits the form
BSN Collection Regulation
The online declaration form provided to be used does ask for the BSN number of participants, but as this is for financial reasons (and not for the research), this is allowed under the GDPR. BSN information can be collected for financial purposes, but not for research purposes. Finance has the legal ground to process this data, whilst researchers do not.
BE AWARE: Privacy regulations have changed. The xls form to file payments in bulk, used in the past, is NO LONGER SUPPOSED TO BE USED. Reasons being that the form typically contained personal information from multiple participants, that in between may live on not-encrypted local computers (even of master students) and that could create a situation in which one particpants sees which other people already participated in the experiment in the excel file. Neither is allowed under the GDPR. Therefore, we request you to refrain from using or sending this document going forward.
Lab Equipment
Here you can find information about the equipment used in the labs.
PCs
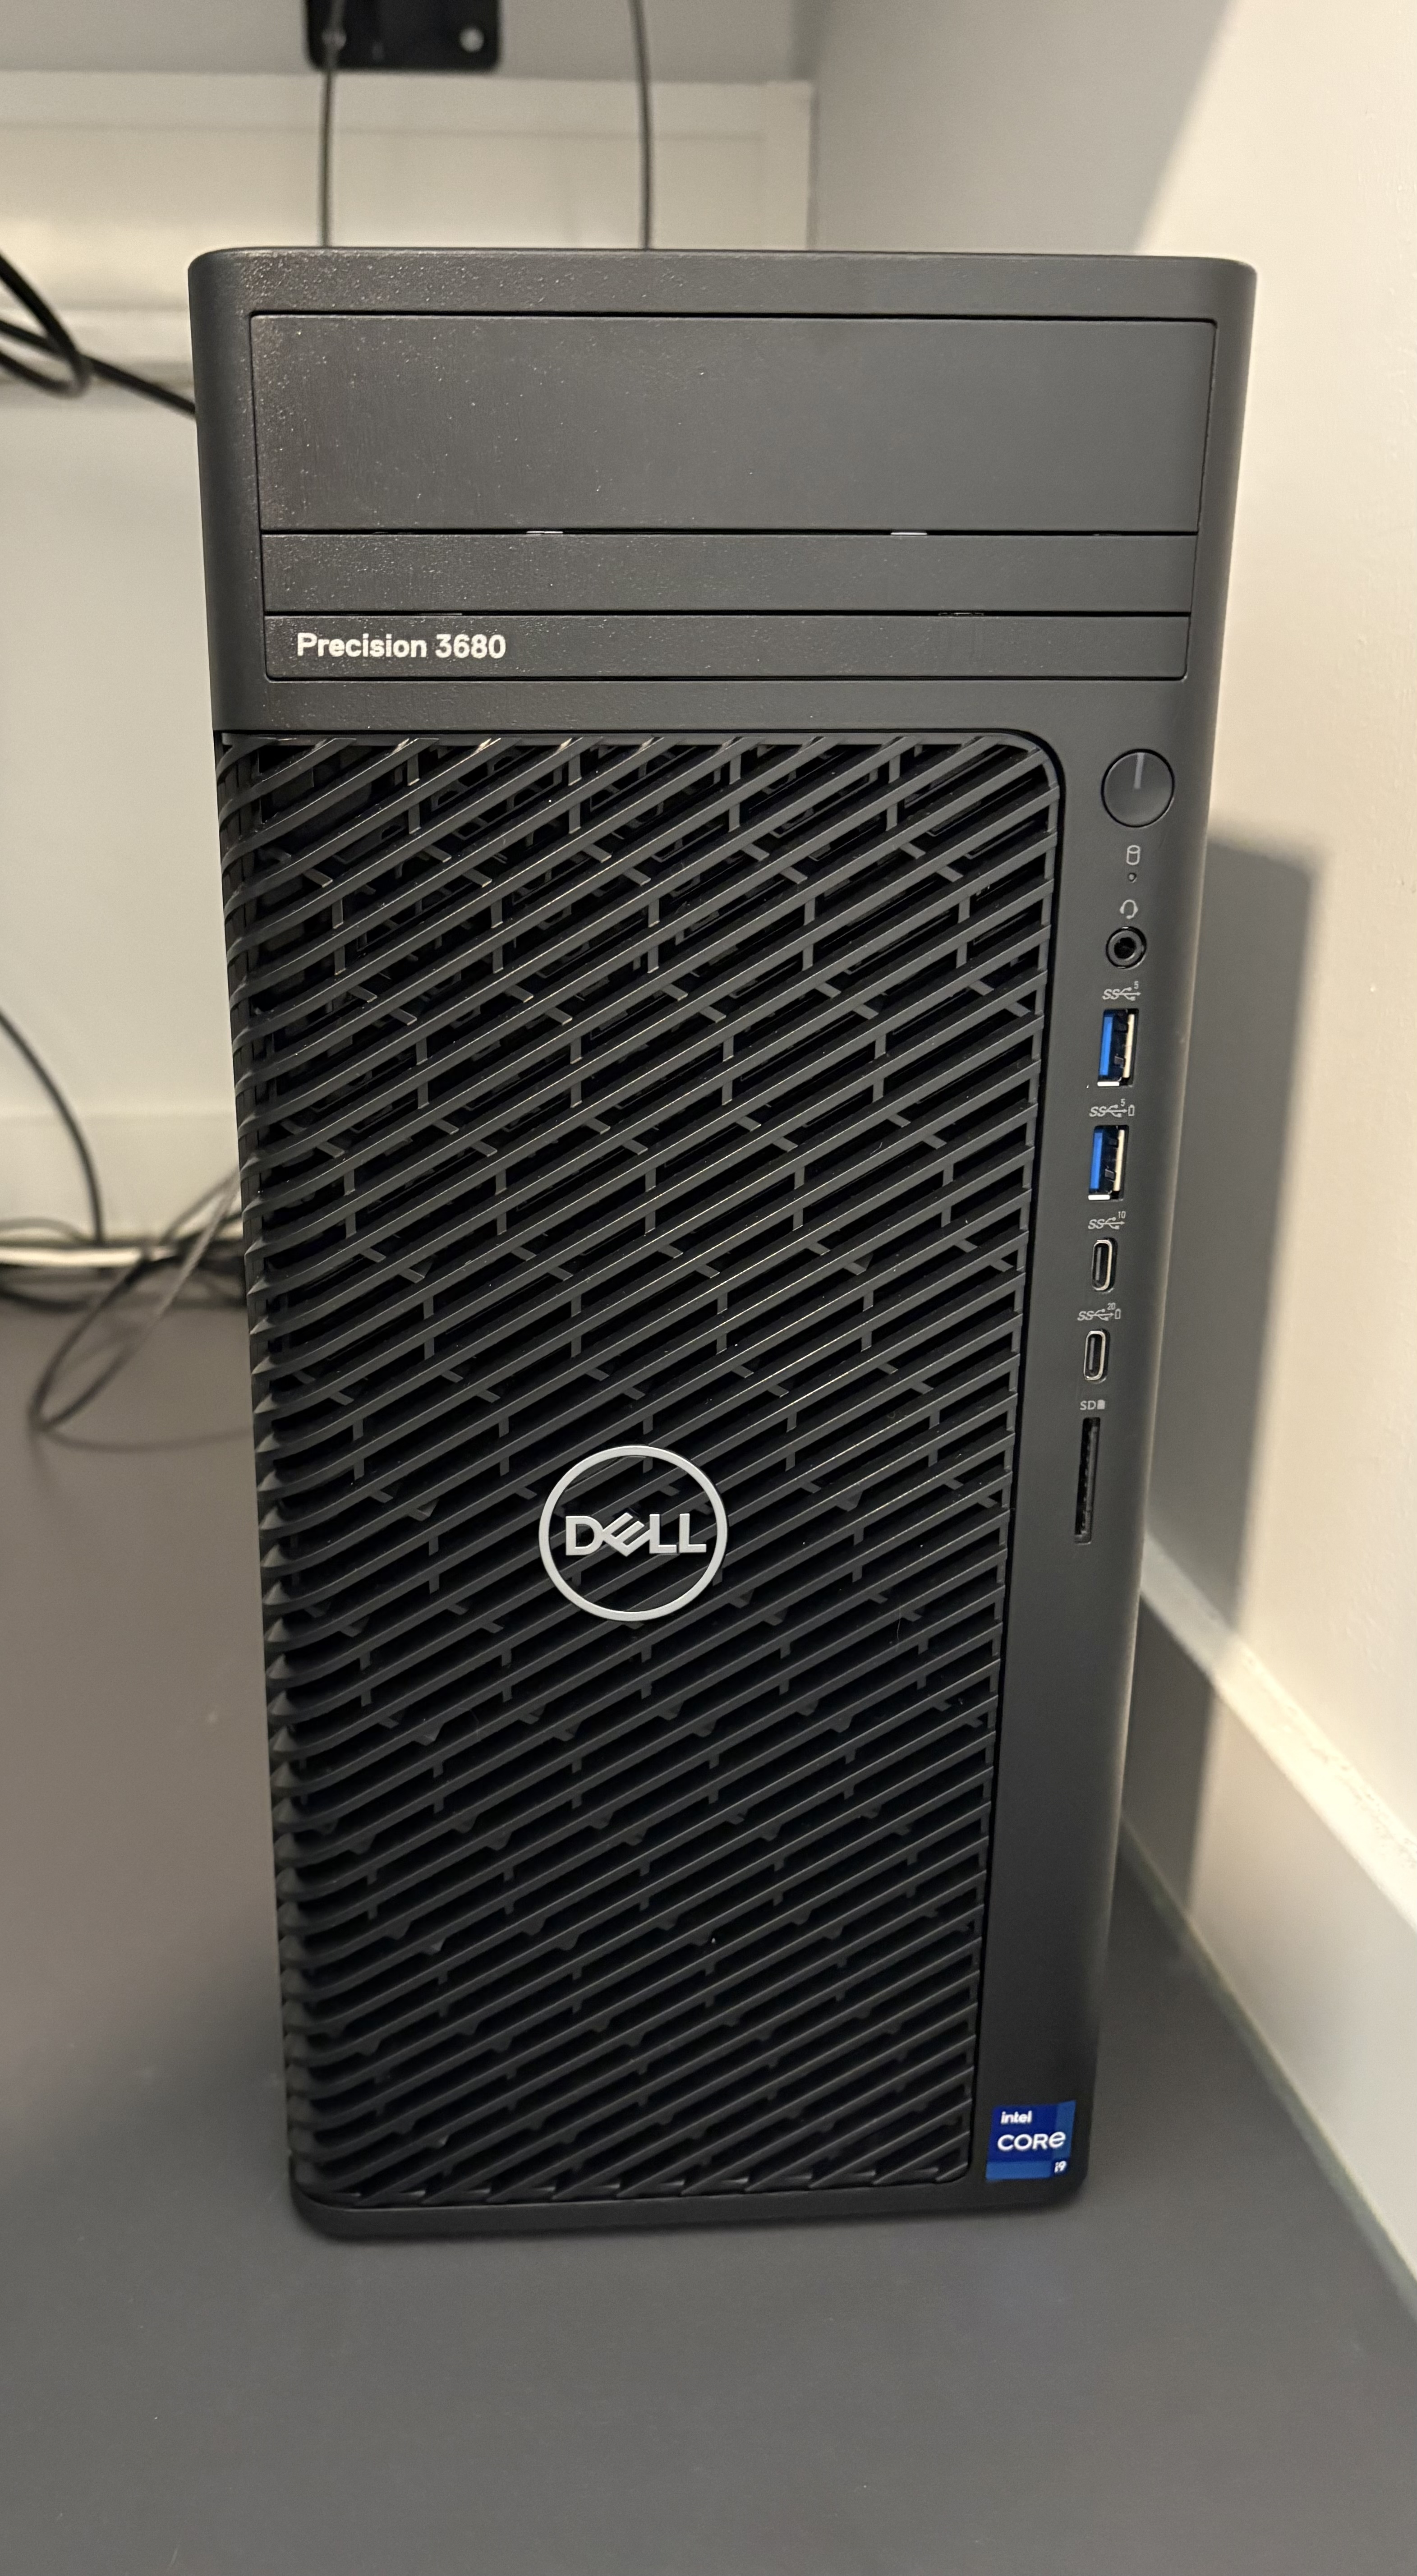
All computers in the lab that are used for presenting stimuli or monitoring EEG (Biosemi PCs; using ActiView) are windows computers of the model Dell Precision 3680 Tower. You can find the exact specifications for the PCs used in the labs below. Alternatively you can download the PDF version here: 3680_PCSpecs.pdf
Specifications
| Category | Specification |
| Model |
Dell Precision 3680 Tower |
| Processor (CPU) | Intel® CoreTM i9-14900K (24 cores, 32 threads, up to 6.0 GHz Turbo) |
| Memory (RAM) | 32 GB DDR5 (2×16 GB, 4400 MT/s) |
| Storage | 1 TB NVMe Solid State Drive (Gen 4 PCIe) – No spinning hard drive |
| Graphics | Intel Integrated Graphics 770 |
| Dedicated GPU | Nvidia Quadro P620 |
| Operating System | Windows 11 Pro |
| Power Supply |
1000W Platinum-rated PSU |
| Cooling | Premium CPU Air Cooling with VR Heatsink |
| Wi-Fi / Wireless | Not included (Ethernet only) |
| Optical Drive | None (No DVD/CD drive) |
When there are multiple PCs used in a set-up (B-447, B-449, EyeLink Cubicles), then the PCs are labeled 'Stimulus', 'Biosemi', or 'Eyelink' respectively.

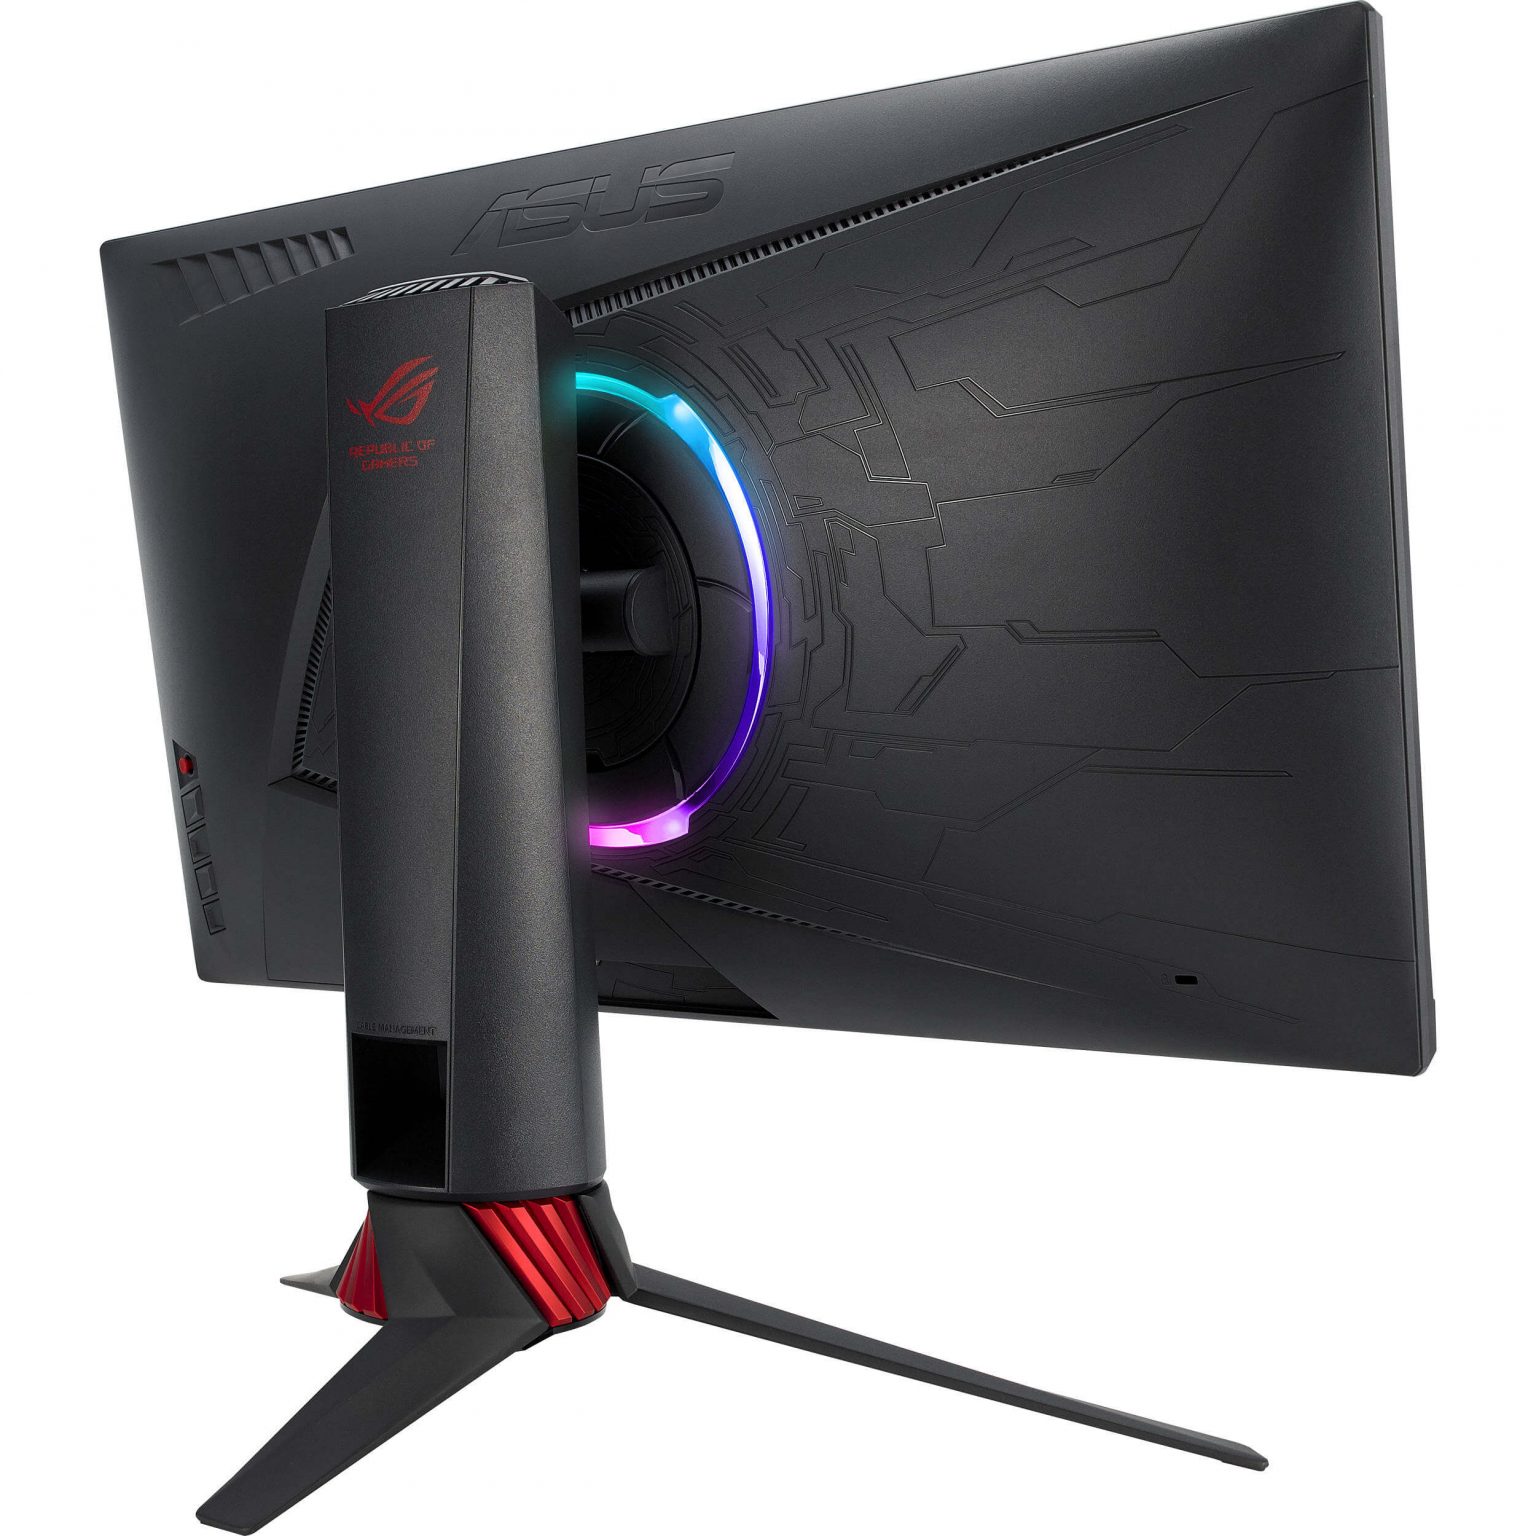
Monitors
In the lab, we make use of different monitors. In the behavioural cubicles, there is only one monitor. In the EEG or EyeLink set-ups, there are at least 2 monitors. All monitors that are used for presenting stimuli are of the model ASUS ROG Strix XG248Q . This is also the case for all the behavioural cubicles. The monitor that researchers look at is a slightly different model: ASUS ROG Strix XG258 . You can find more details in the linked webpages.
ASUS ROG Strix XG248Q (Stimulus)
Resolution: 1920 x 1080 pixels / Full HD
Diagonal: 23.8 inches / 60.4 cm
Width x Height: 527 x 296 mm
Refresh Rate: 48 - 240Hz / Actual max: 239.96Hz
ASUS ROG Strix XG258 (Researcher)
Resolution: 1920 x 1080 pixels / Full HD
Diagonal: 24.5 inches / 62.2 cm
Width x Height: 544 x 303 mm
Refresh Rate: 48 - 240Hz / Actual max: 239.76Hz
By default, the refresh rate of the monitors are set to 240Hz. You can change this in the Windows settings if you need to set the monitor to a lower refresh rate. You can also adjust it through the GPU's Control Panel.
If you need monitors with specific requirements (touchscreen, dimension, refresh rate, resolution, etc.), then contact the Lab Coordinator and we can discuss the possibilities.
Support & Peripherals
There are all sorts of support or peripheral equipment in the lab that you can use. Some of them are described below. If you need something specific for your research, you can discuss this with the Lab Coordinator to see what is possible.
If you notice that something is broken, missing, or malfunctioning, please report this to the Lab Coordinator.
Extension Cords
There are special extension cords under the desks that provide power to the monitors or EyeLink cameras only when the corresponding computer is turned on. This is to prolong the lifespan of the equipment. We advise you not to use these extension cords for your own devices. Please use the sockets that are on top of the desk. Also, please do not change anything to how the extension cords are set up. Inside of the participant rooms, there are additional sockets available.
Intercoms
In the EEG and EyeLink set-ups, there are intercoms present for communication with participants during the experiment. Turn the round button clockwise to hear your participant speaking. Turn this button more than halfway from low to high to have a good volume. When speaking to your participant, keep the button with the word "talk" pressed (this is not needed for the participant, you can always hear them talk when the volume is turned up).
Some rooms already have a newer intercom, in these rooms you need to press the buttons only once to speak or hear the participant.
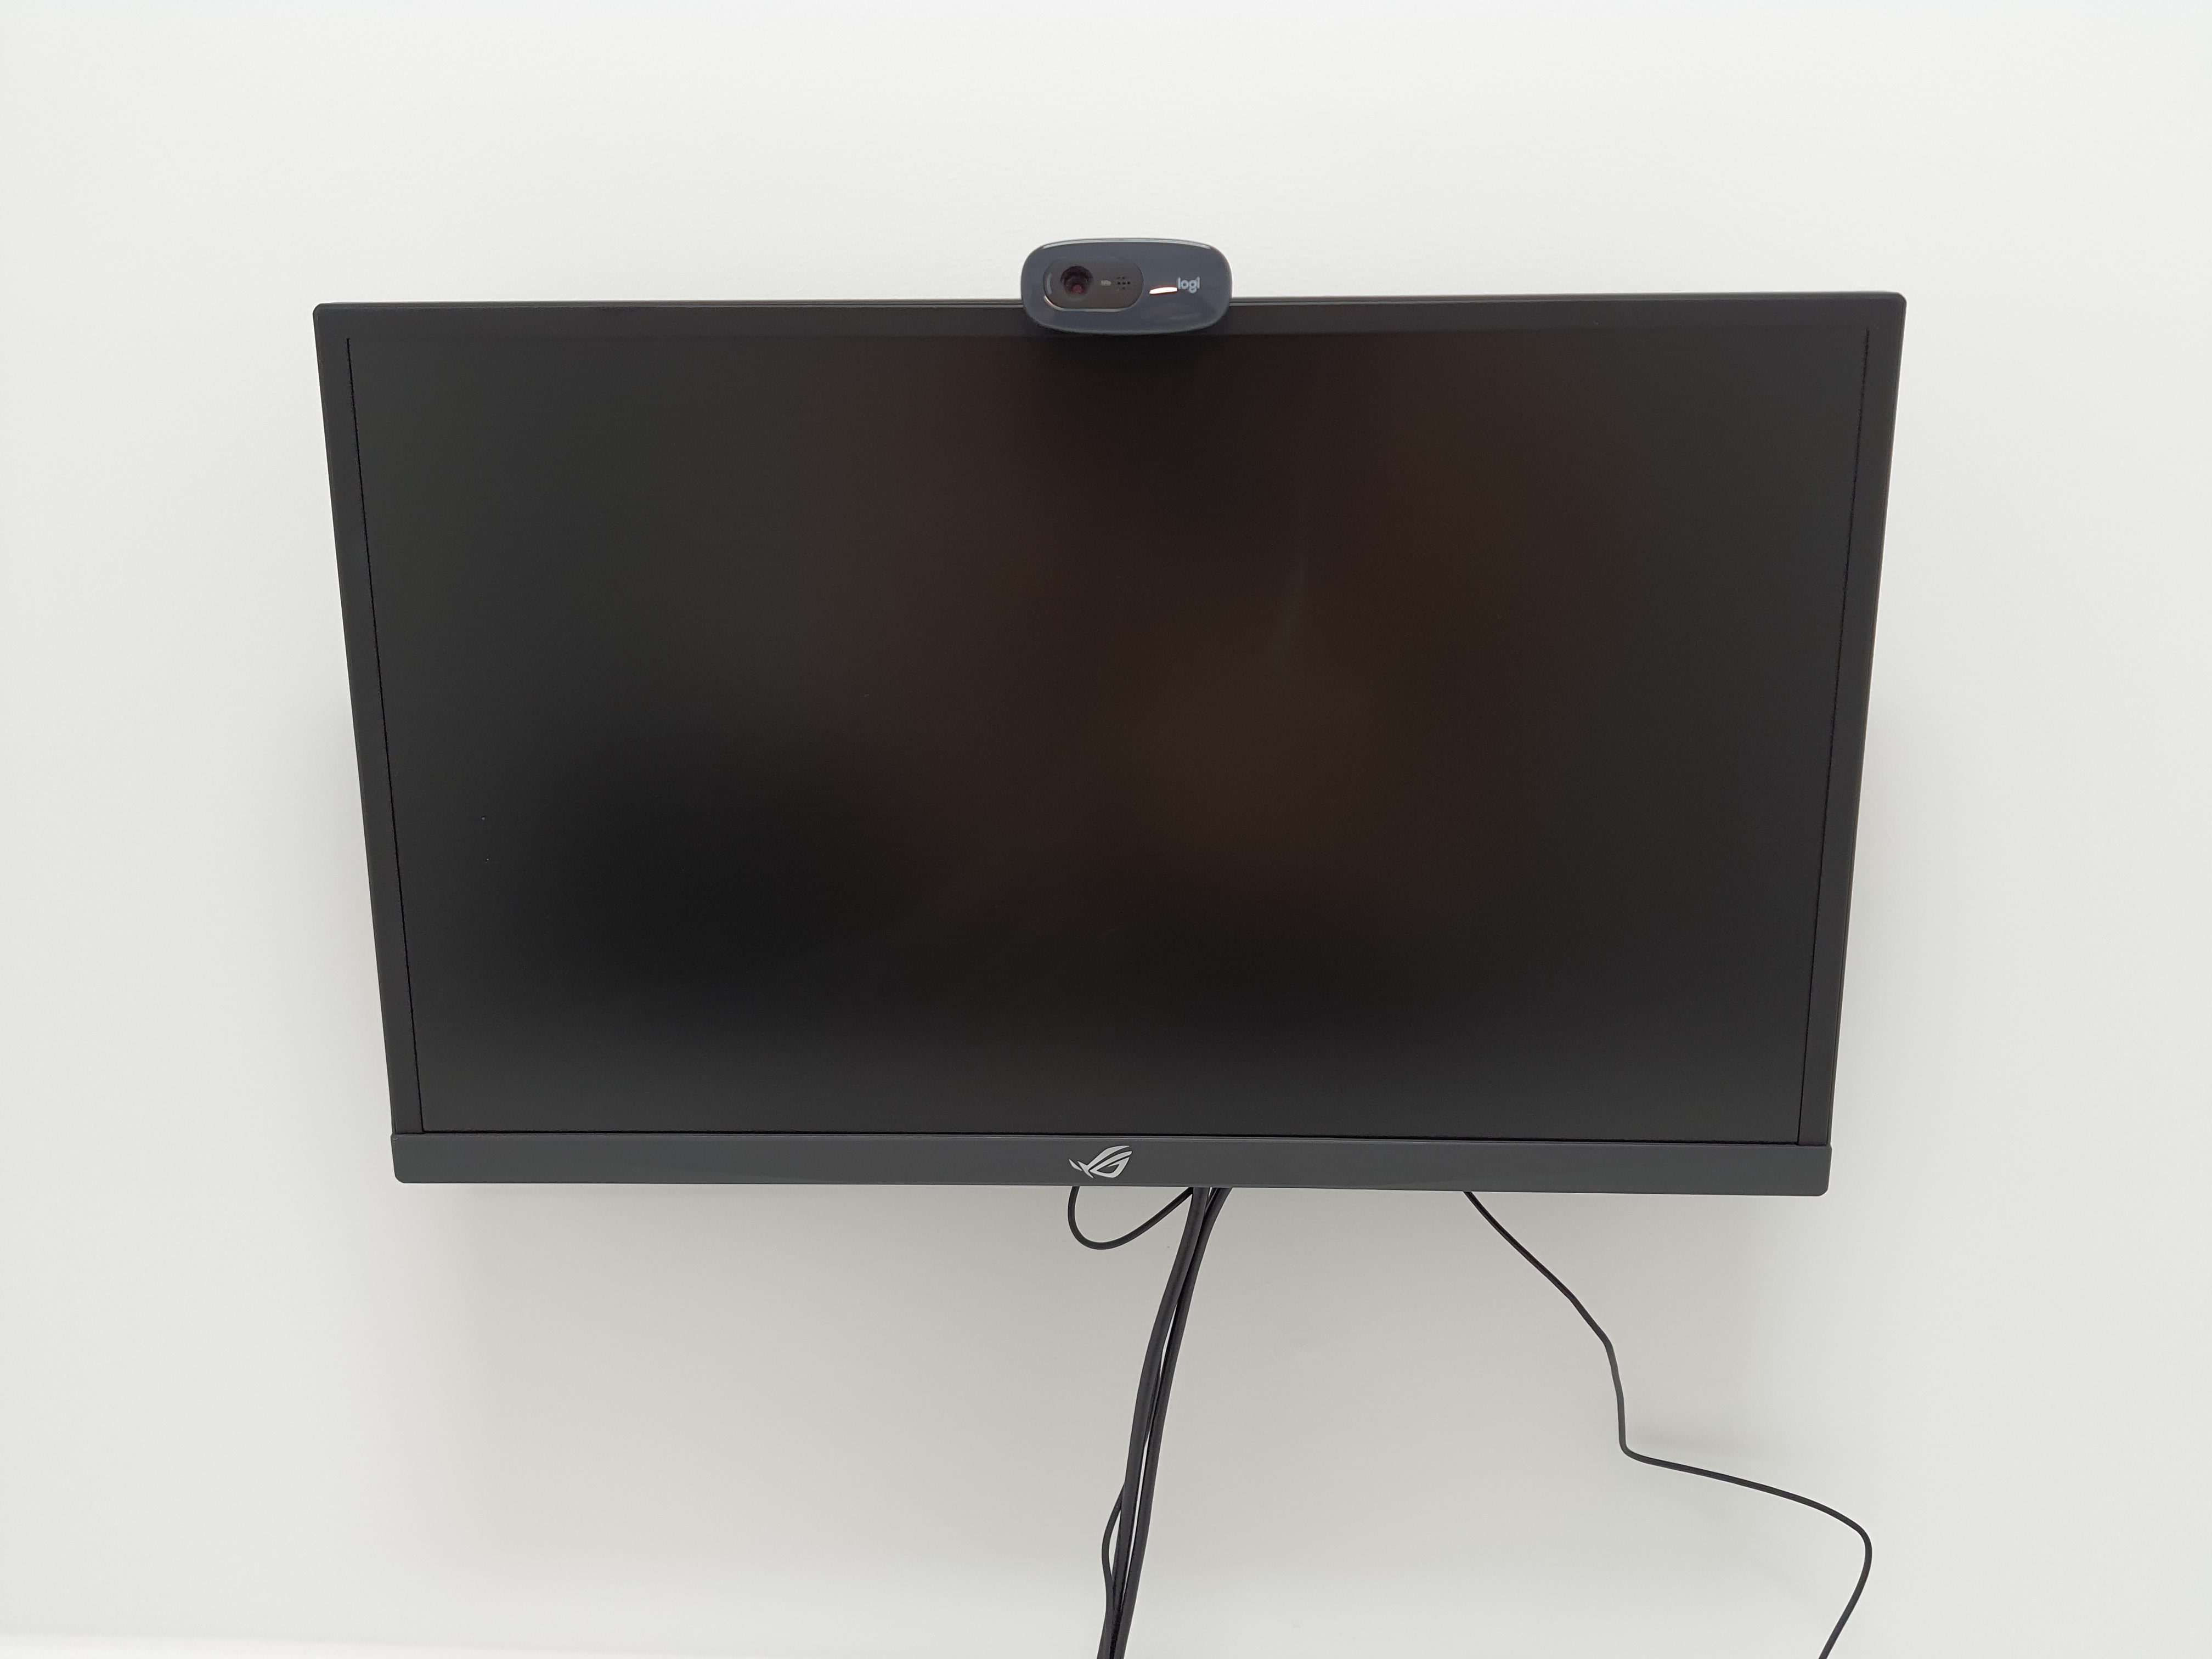
Webcams
There are webcams (Logitech C270) mounted on the stimulus screen of every cubicle. These can record in 720p and have a microphone. If it is missing, you can find some extra in the hallway closets that are unlocked. In addition, we have a couple of webcams that can record in 1080p (Full HD). In order to use these or if you cannot find extra webcams, you need to contact the Lab Coordinator.
High-Speed Keyboards & Mice
You can use high speed keyboards in the lab, for example for experiments measuring response times. The keyboard is the Corsair K100 RGB. The HID Keyboard Report Rate is up to 8.000 Hz. See this link for additional technical details. The colours on the keyboard can be changed (or turned off). By pressing on Q6 you can switch between some pre-defined colour-profiles. You can also set-up your personalised key-colours by going to the iCUE software (for example to only brighten up the arrows, or the letters 'L' and 'R'). You can request this keyboard from the Lab Coordinator.
[LINK AND TEXT ABOUT HIGH_SPEED MICE]
Headsets
There is the possibility to borrow headsets in the lab. The headset contains a retractable microphone with a frequency of 100-10.000 Hz. There is a volume dial on the headset themselves to make adjustments. There are three cables of 1,5 m with different plug options: USB-C to USB-C, USB-C to USB-A-adaptor, USB-C to 3,5 mm minijack. For more technical details see this link.
Chinrests
Most of the EEG and EyeLink have chinrests installed. You can find extra ones in the supply closet in the back of space B447. Some cubicles also have chinrests. If you need more, contact the Lab Coordinator.
Other
You can find all sorts of other support equipment, like cables, mice, writing materials, keyboards, etc., in the unlocked closets in the hallway of the Brain & Behaviour lab. You may grab what you need there. Make sure to put borrowed items back if you no longer need them.
[EXAMPLE PICTURES OF HALLWAY CLOSET]
Behavioural Cubicles
Here you can find information about the behavioural cubicles (rooms A437a-w).
Availability
There are 18 cubicles available for behavioural research. They are labeled with a letter (A-W, except for G,M,N,O and P).
The cubicles cannot be booked beforehand. If you want to use them, you can simply go to the Brain & Behaviour Lab and select free cubicles to use. Usually, the cubicles are never fully occupied. There have always been at least 2 cubicles free for use at any time point. It is important to keep other researchers in mind when using cubicles, so do not just occupy as many cubicles as you can. If it is not busy, you are welcome to use up to 10 at one time. In busy periods, the Lab Coordinator may limit the number of cubicles you are allowed to use, to distribute everything fairly among the researchers. If you need to test more than 4-5 cubicles in busy periods, then notify the Lab Coordinator in advance in order to avoid a shortage of available cubicles.
There are sliders on top of each cubicle to indicate whether the cubicle is in use. When you are making use of a cubicle, slide it to red, so that others can see it is occupied. You can also do this to reserve a number of cubicles. Do not forget to slide it back to green when you are done!
Camera Monitoring
The behavioural cubicles in the labs (A437-A to A437-W, excluding the Eyelink Cubicles) are equipped with live camera monitoring to ensure the safety and well-being of participants and maintain the integrity of experiments. The live stream is conducted through a secure offline network and is not stored. Images are blurred by default to prevent the screen/monitor of the participant from being seen or read. In order to unblur, simply hover the cursor over the image!
Participant Consent
Consent from participants is required. Informed consent forms are available in English and Dutch in the waiting room area next to the monitor PC. Participants can provide consent by marking the form affirmatively. No additional personal information is required. Completed forms should be placed in the 'Informed Consent' box in the waiting area.
Opt-out Option
Participants have the right to decline live-streaming without any consequences. To disable monitoring, participants can turn the camera to face the wall (it rotates 360 degrees) or press play/pause on the monitor PC to stop live monitoring for a specific cubicle. Cubicle L is a designated 'no-monitoring' cubicle where the Camera Monitoring is off by default.
For questions about data management and privacy rights, contact the Data Protection Officer at De Boelelaan 1105, 1081 HV Amsterdam, or via email at functionarisgegevensbescherming@vu.nl. For other inquiries, contact the Lab Coordinator.
[INSERT DIGITAL VERSIONS OF THE CONSENT FORMS AS ATTACHMENTS]
Eye-Tracking
Here you can find information about the EyeLink eye-tracking systems.
EyeLink Set-up
There are nine rooms with an Eyelink system available. The eye trackers have different models and specs. Please think of what you need for your experiment before you reserve a specific lab.
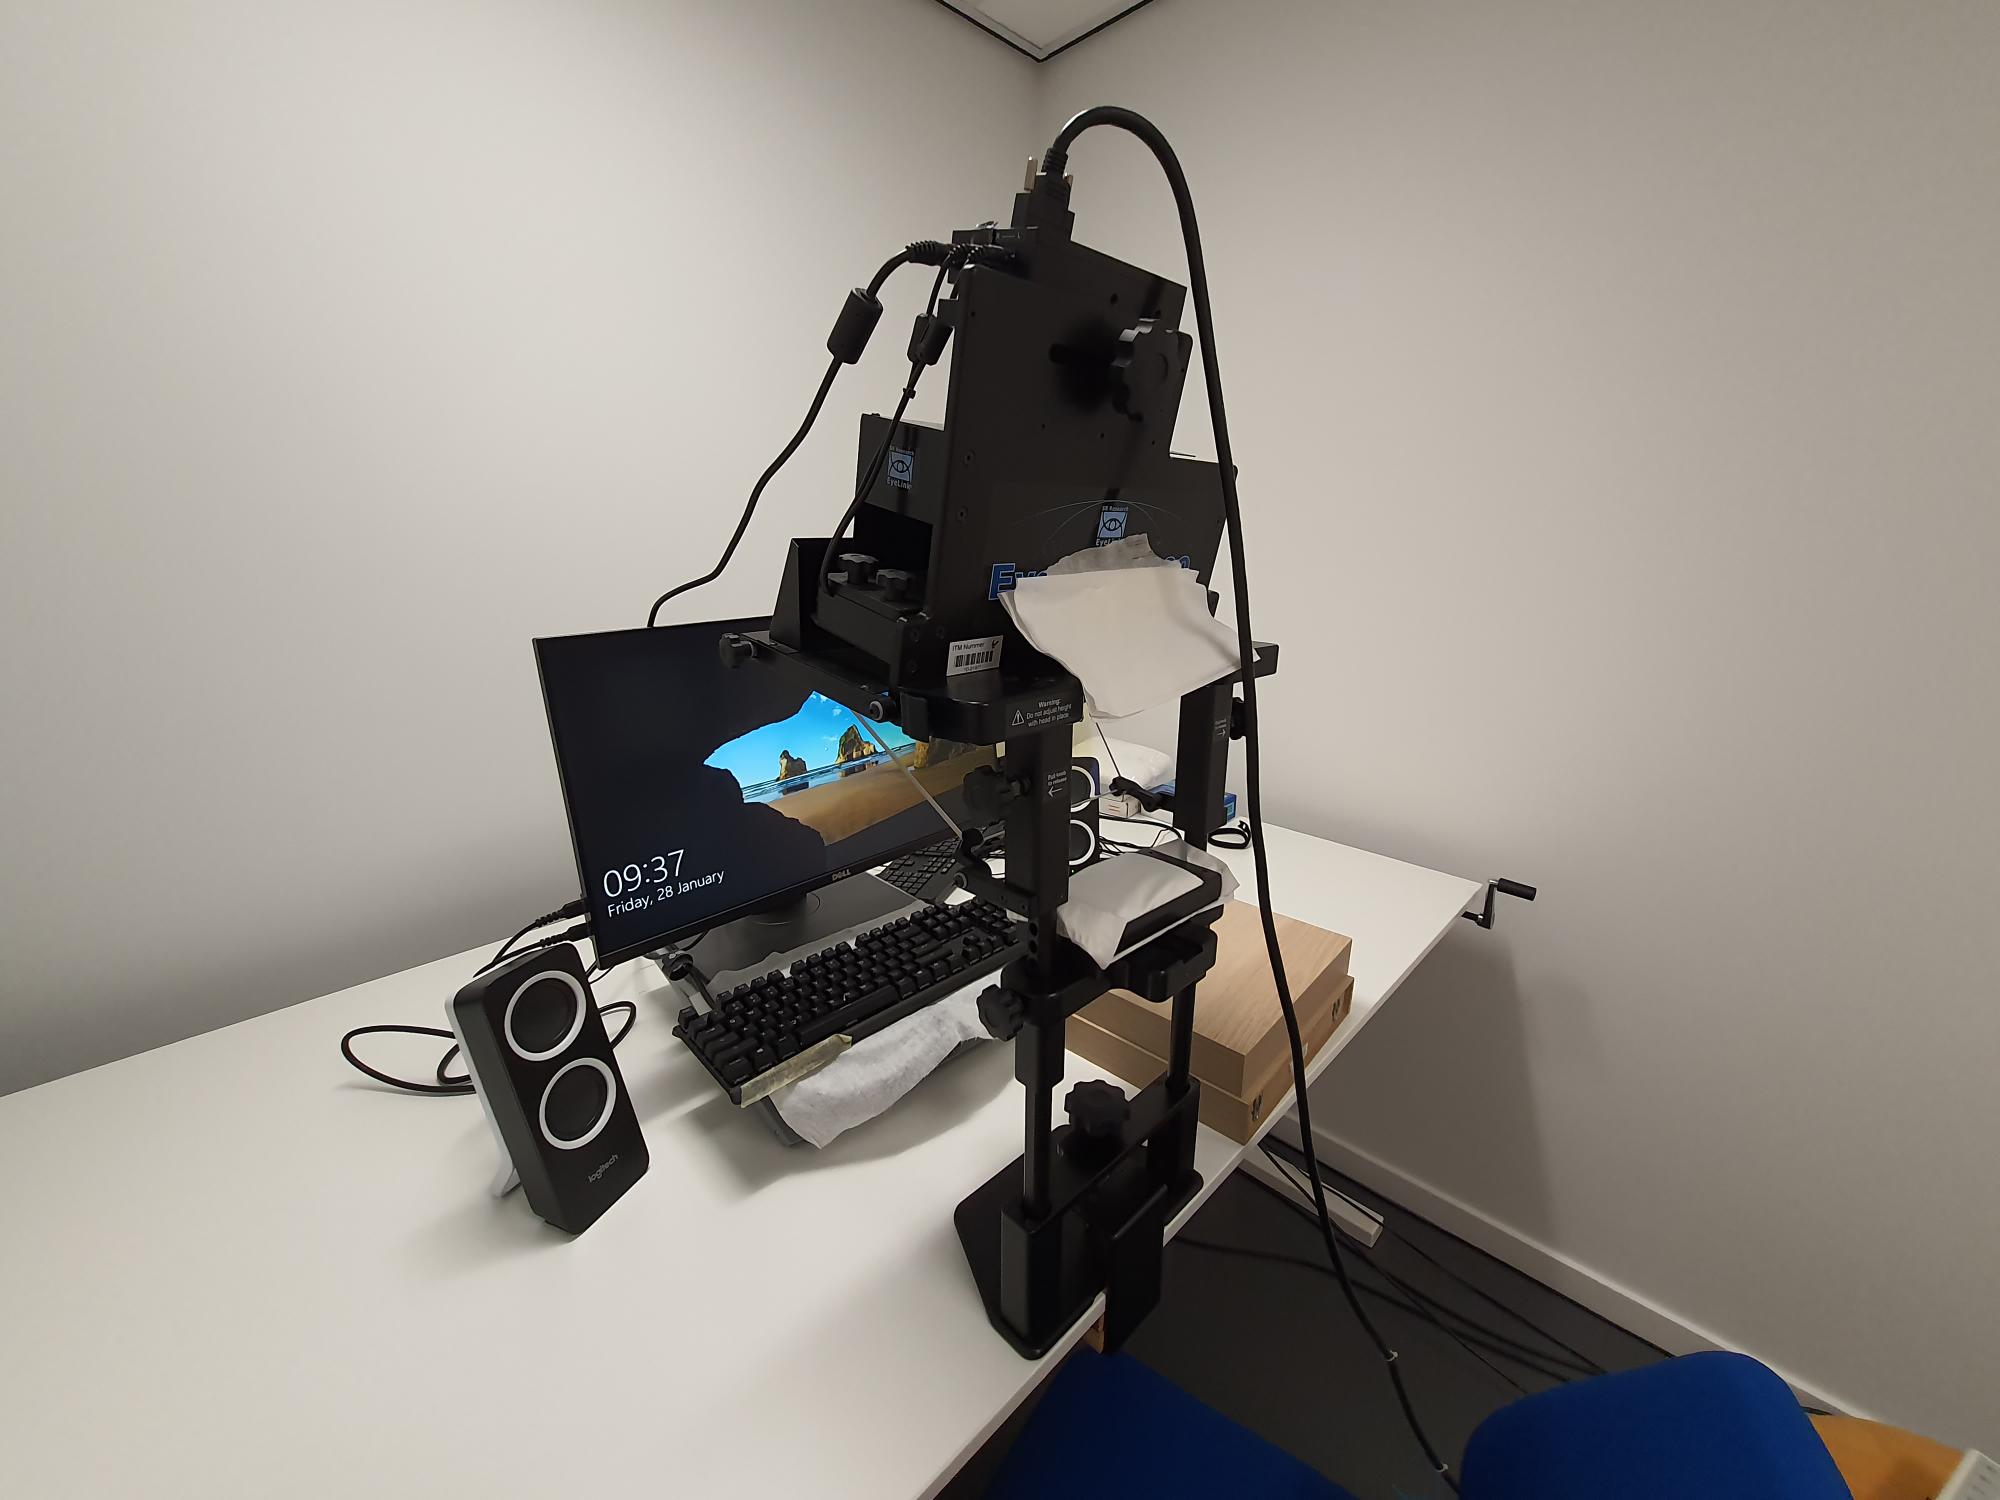
Example of one the Desktop Mount Eyelink cameras:
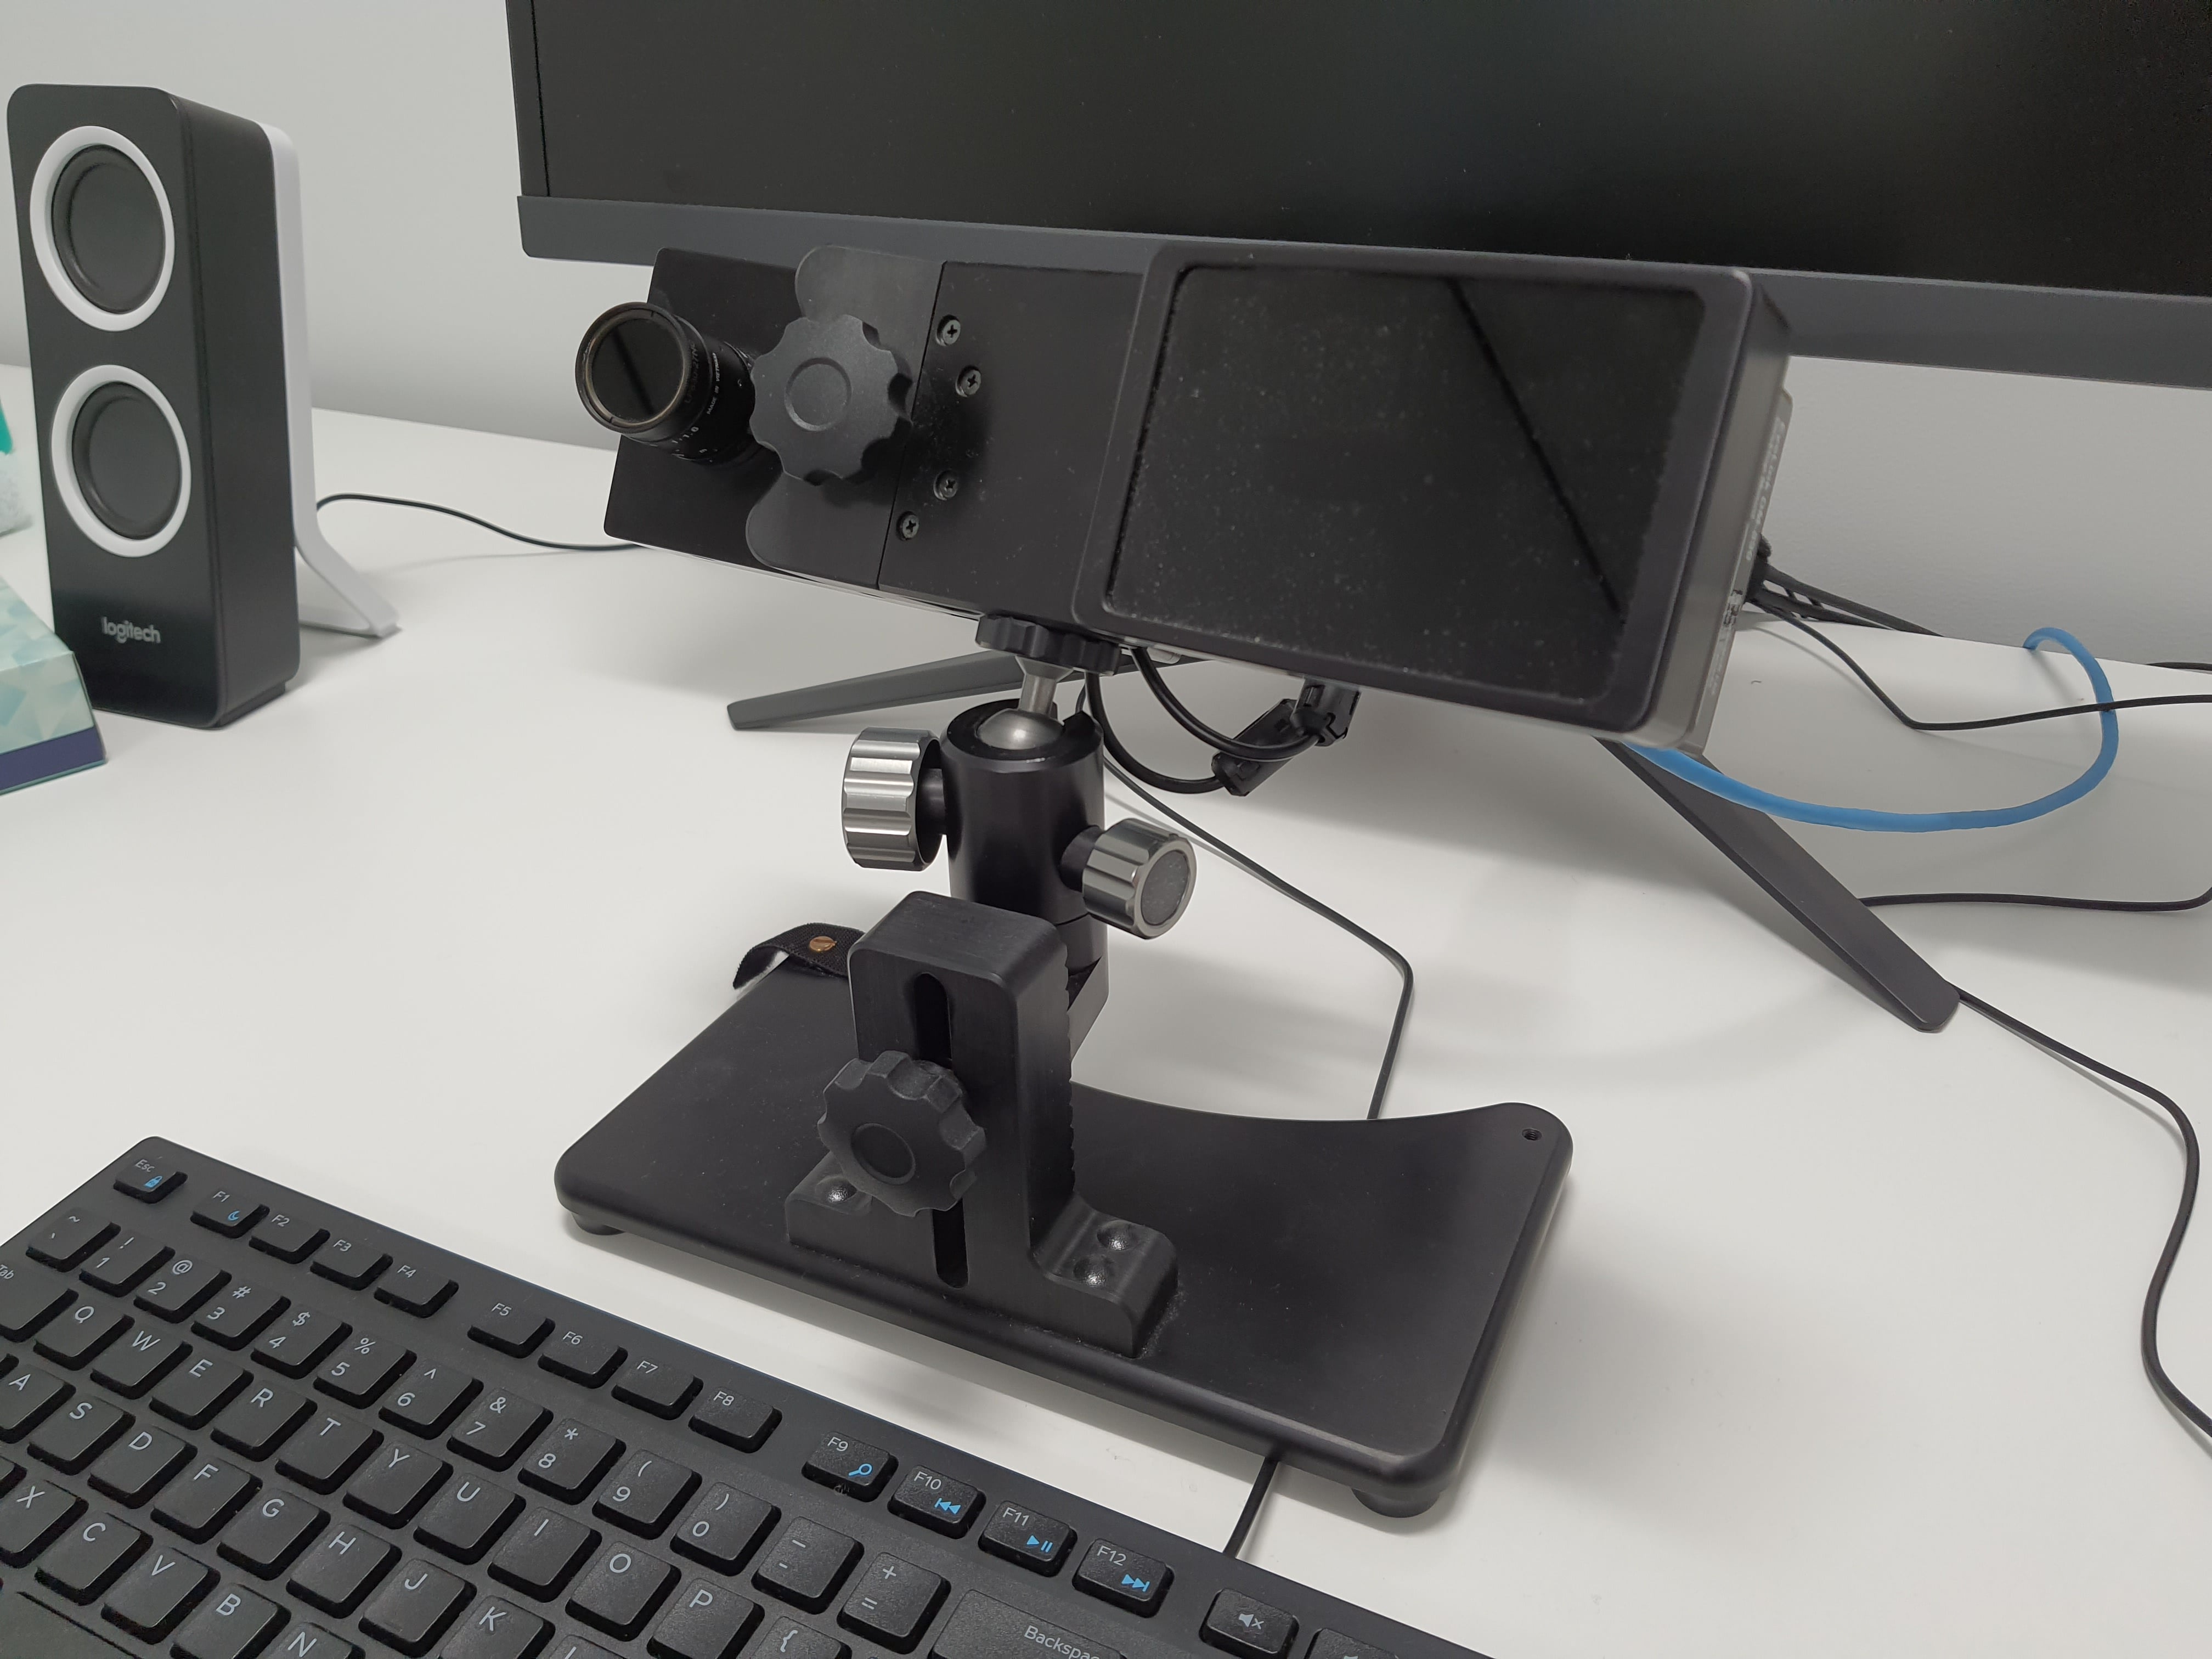
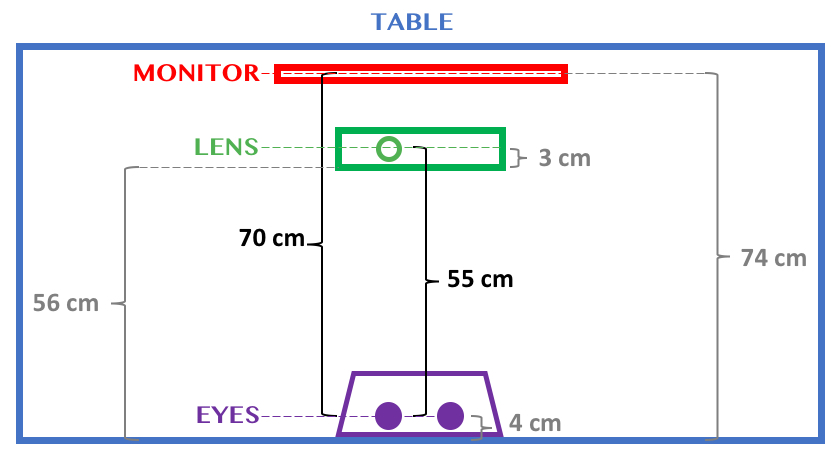
All nine Eyelink rooms have black stickers placed on the table. These stickers indicate where to place the equipment for the default set-up of: eye-to-Eyelink distance of 55 cm, and eye-to-monitor distance of 70 cm. If you prefer to use other distances, please move your equipment relative to these stickers without removing them. Please do not leave tape on the table to mark your personal preference. If you plan to use the same lab for a long period of time, please email bblabs.fgb@vu.nl or the Lab Coordinator so we can place a second set of stickers on the table placed at your personal preference. When you are done using the lab, please place the equipment back on the black stickers.
Visual representation of the default Eyelink set-up (table stickers):
EyeLink Models
The different rooms have slightly different models of the EyeLink devices. Here is an overview. Make sure to consider this carefully!
Space B449 & EyeLink Cubicles
The rooms in B449 (a, b, c, and d) and the EyeLink cubicles (A437m/n & A437p/o) make use of:
EyeLink 1000 Plus Desktop Mount
Stabilized: Up to 2000 Hz monocular and binocular. Remote: Up to 1000 Hz monocular and binocular.
Space B447
The rooms in B447 (a, b, and c) and the EyeLink cubicles (A437m/n & A437p/o) make use of:
EyeLink 1000 Plus Desktop Mount
Stabilized: Up to 2000 Hz monocular and up to 1000 Hz binocular. Remote: Up to 500 Hz monocular and binocular.
Tower EyeLink System
There is also the option to use the Eyelink 1000 Tower Mount system (for example for experiments including touch screen). It can go up to 1000 Hz with one eye.
Please send an email to the Lab Coordinator in advance, as this system is not a default set-up. It will need to be set-up before use.
The EyeLink 1000 Tower Mount camera:
Eye-tracking Protocol
Here we describe the general procedure when conducting eye-tracking experiments.
Steps
- Check that the participant is not wearing eye make-up like mascara or hard contact lenses since these will both interfere with the measurement of eye movements. If they are wearing make-up you can ask them to remove it with the make-up remover found in all the eye tracking labs.
- Sit the participant down in the chair in front of the eye-tracker. Ask them to adjust the chair in such a way that they can put their head in the headrest comfortably. If necessary you can also make some finer adjust by using the knobs on the side of the headrest, but preferably keep this at the same height across participants.
- Turn on both the stimulus computer and the Eyelink computer. If the Eyelink computers gets stuck during startup, turn it off and on again.
- Start up the experiment. When using opensesame, make sure that eyelink_mode function says “tracker attached” and not dummy mode. Also check that the settings on the eye-tracking computer are set to default. Enter the camera setup in opensesame by pressing ENTER or by pressing the camera setup button on the eye- tracking computer.
- Set up the eye tracker by aiming the camera in such a way that the participants’ eye is in the center of the image. Make sure that the other eye (the one that’s not being tracked) is not in the image. On the participant computer you can cycle through 2 different points of view by using the arrow keys. The first one shows you an overview of where the camera is aimed. The second one shows you the individual eye. If the computer doesn’t select the eye automatically you can do this manually by click the eye on the eye-tracking computer. Check if the eye is in focus and adjust the focus of the eye-tracker lens if necessary.
- Once the eye is selected you can set the threshold by pressing A (auto threshold). Check if the entire pupil is selected. If this is not the case you can adjust the threshold manually by pressing the up and down arrows on the keyboard.
- Calibrate the eye tracker. You can do this by pressing C and V (to validate the calibration). During this process, the participant should follow the dot with their eye. The calibration trace should roughly look like a square.
- When the eye tracker is properly calibrated (max 1 dva difference between calibration and validation) you can start the experiment by pressing OUTPUT/RECORD button on the eye tracking computer or the Q on the participant’s computer.
- Give the participant the instructions for the experiment and make sure that everything is clear. It is important that they keep their head stable in the headrest and try to keep their blinking to a minimum. Also tell them when to rest and blink as much as they want during the experiment, if applicable.
- If the calibration gets messed up during the experiment for any reason you can just enter the camera setup again to recalibrate. After you’ve done this you can continue the experiment by pressing OUTPUT/RECORD.
Additional Information
If you decide to change any aspect of how the equipment is set up in the cubicle, this may have to be changed in the settings of the Eyelink computer.
Examples include drastically changing the height or distance of the monitor to the participant, changing the distance from the Eyelink camera to the monitor or using a different monitor than the one the lab provides. Changing any of these things can have an effect on how the Eyelink computer computes the saccade amplitude and velocity (spatial accuracy remains unaffected). If you do not use the values that are calculated by the Eyelink computer, you do not need to worry about these settings.
Small changes to the monitor positions should be okay and not affect your measurements by too much. If you do decide to change the screen configuration settings of the Eyelink pc, make sure to change the settings and monitor position back to how they were when you finish data collection.
How to change the screen config settings for Eyelink 1000 Plus systems:
- Turn on the Eyelink pc.
- Exit the eye tracker by pressing CTRL+ALT+Q. This takes you to the file manager.
- Find the settings gear icon.

And find the "screen settings" option.

- Change any of the settings according to how you have placed the equipment and click save. The different settings include screen dimensions, display resolution, eye-to-screen distance and camera-to-screen distance. See below for an example of one of the settings:

- Now you can continue collecting data with the right settings.
If you forgot to change the settings and believe this is crucial for your data, you can recalculate saccade amplitude and velocity with a correction. Use the automatic reparsing functionality in the Eyelink Data Viewer software to do this. A dongle with a license for the software is available in the storage closet in B-449.
If you are using any of the two older Eyelinks (room B449-b or B-449c), changing the settings is a bit different. Ask the technical staff to help you with this.
Original Settings
EEG
Here you can find information about Electroencephalography (EEG).
EEG Set-up
In the Brain & Behaviour Lab, there are a total of 7 BioSemi systems. Three of them are permanently in B-447(A, B, & C). Two of them are rotated in the rooms of B-449(A, B, C, & D). The remaining two BioSemi systems can be used on request in B-449 (contact the Lab Coordinator). Usually the remaining two are also placed in the rooms of B-449. So, in practice the rooms all have an EEG system, but keep in mind that this is not always certain for two rooms in B-449!
EEG Conduct
The A/D-boxes and electrodes are expensive and sensitive equipment and should therefore be handled with equivalent care. So, there are a couple of basic rules that you should keep in mind when handling EEG:
- Never let a participant take an A/D-box with them when going someplace other than the experiment space (e.g., the toilet, taking a break, etc.).
- Do not bend the electrodes or be rough when attaching or disconnecting the electrodes to the inputs.
- Do not bring electrodes in contact with metal surfaces as this may result in all sorts of damage.
- Do not handle any fluid or other small particles near the A/D-box, anything going into the ports can damage the device permanently.
Sending Triggers
Triggers are sent using a Serial Port.
EEG Supplies
In the back of the EEG lab (B-447), to the right, there is a storage closet full of supplies that are needed to conduct EEG experiments. These include gel, stickers for electrodes, rubbing alcohol, gloves and tissues. There are caps and electrodes present in the lab, as well as multiple batteries for the BioSemi. If there is low stock of anything, please contact the Lab Coordinator.
[INSERT PICTURE OF SUPPLIES CLOSET]
EEG Models
We have two models of Biosemi A/D-boxes. Two are the newest ActiveThree's and the remaining five are ActiveTwo's/Active2.5's.
ActiveThree
Two rooms of B-447 (A & B), make use of the newest BioSemi ActiveThree systems. These work primarily the same as the older system, but have slight differences in procedure. On the desks for these rooms, instructions are placed; please make sure to read these! You can also find these in the "Attachments" section next to this chapter.
ActiveTwo/Active2.5
The remainder of the rooms make use of the BioSemi ActiveTwo/Active2.5 systems.
EEG Protocol
This is a manual for general use of EEG based on the "Quick Reference Guide" by Jonathan van Leeuwen.
Before Participant Arrives
- Turn on computer.
- Turn on Actiview on BioSemi computer.
- Start the experiment on the experiment computer.
- Check battery, always use a fully charged battery (one battery should always be charging).
- Prepare the things you need for measuring EEG.
- EEG electrodes
- EOG electrodes
- CMS and DRL electrodes
- Electrode caps in various sizes
- Gel syringe
- Electrode gel
- EOG stickers
- Scissors
- Cleaning tonic for the skin
- Salt
- Plastic tub
- Scissors
- Towel and shampoo
Preparation of the Participant
- Talk to participant, if participant has participated in EEG experiment before, roughly explain what you are going to do. If participant has never participated in EEG experiment, explain extensively what he/she will have to do. Always talk to the participant while you are applying gel and electrodes and tell the participant what you are doing. Interact with the participant, make them feel comfortable.
- Get the participant to go to the toilet before anything starts.
- If the participants skin is very oily or has makeup clean it softly with the cleaning tonic and tissues (the locations where the EOG electrodes are being placed).
- Measure the head circumference and find correct EEG cap.
- Place the EOG electrodes:
- EXG1: 2cm above the right eye (aligned to center of eye)
- EXG2: 2cm below the right eye (aligned to center of eye)
- EXG3: 1cm right of the right eye (aligned to center of eye)
- EXG4: 1cm left of the left eye (aligned to center of eye)
- EXG5: On right mastoid behind right ear (reference)
- EXG6: On left mastoid behind left ear (reference)
- Place EEG cap (make sure its placed correctly and that the label is outside of the cap).
- Fill electrode holders with gel 3/4 full.
- Attach the electrodes to the EEG cap, one bundle at a time (also attach the CMS and DRL).
- Put participant in the cubicle.
- Check that the subject is sitting at the correct distance (75cm from screen).
- Attach the electrode bundles to the BiosemiAD converter (CSM within range).
- Check that the incoming data is of sufficient quality.
- Tell the participant to try to limit his/her eye-blinking.
Start Experiment
- Close the cubicle door and turn off lights.
- Start the EEG data collection in Actiview (make sure that it is saving data).
- Start the experiment.
- Check that there are incoming port codes in Actiview during the experiment (IMPORTANT).
- If you are measuring separate blocks, make sure that you stop and start the EEG collection after and before each block.
End Experiment
- Stop all data collection on the computers.
- Turn on light in the cubicle.
- Turn off the BiosemiAD converter.
- Unplug the electrode(s)(bundles) from the BiosemiAD converter.
- Carefully take out all the electrodes from the cap (easiest if participant is still wearing the cap).
- Remove the EEG cap.
- Remove the EOG electrodes.
- Give participant a towel and show them where to clean their hair.
- Start cleaning the electrodes and the EEG cap.
- When participant is done with cleaning up, get participant to sign/fill in payment forms.
- Thank participant and show him/her to the exit if necessary.
- Continue cleaning the electrodes and EEG cap.
- Backup data (IMPORTANT).
- Turn off the computers and lights.
Extended Manual for BioSemi Equipment
For more detailed information on the use of the BioSemi EEG system, please have a look at the following manual.
Configuration
To compute the visual angle for your screen configuration when using EEG use the following helping excel file .
Sharing Screens Between Computers
There is software installed for showing the screen of the BioSemi computer on the stimulus screen inside the cubicle. This can be useful when you want to show a participant or student their live data for educational purposes. Follow these steps to accomplish this:
- Search for "UltraVNC Server" in the searchbar of the BioSemi pc and launch it.
- Search for "UltraVNC Viewer" in the searchbar of the stimulus pc and launch it as well.
- On the stimulus pc, behind "server:port", type the name of the computer (e. g. "B447A-80-B") and click connect.
- You are asked to insert a password on the stimulus pc, this is
view!. - Click "accept" on the BioSemi pc and the connection will start. You will now see the BioSemi screen on the stimulus pc.
- To end the connection, press the x in the upper right corner on the stimulus pc.
Cleaning Instructions Caps
Please clean the gel from the caps thoroughly, it can help to soak the cap in warm water before rinsing the individual holes. Make sure that no gel remains so that the next researcher can use a fresh and clean cap for their participant.
Preferably do not use a hairdryer on the caps, this can damage them. If you must, use low heat and keep enough distance between the cap and the hair dryer. Also, do not hang caps to dry, this will deform them. Instead, lay them on a towel to air dry after washing.
There is a sink present for cleaning in the EEG lab.
[Insert PICTURE]
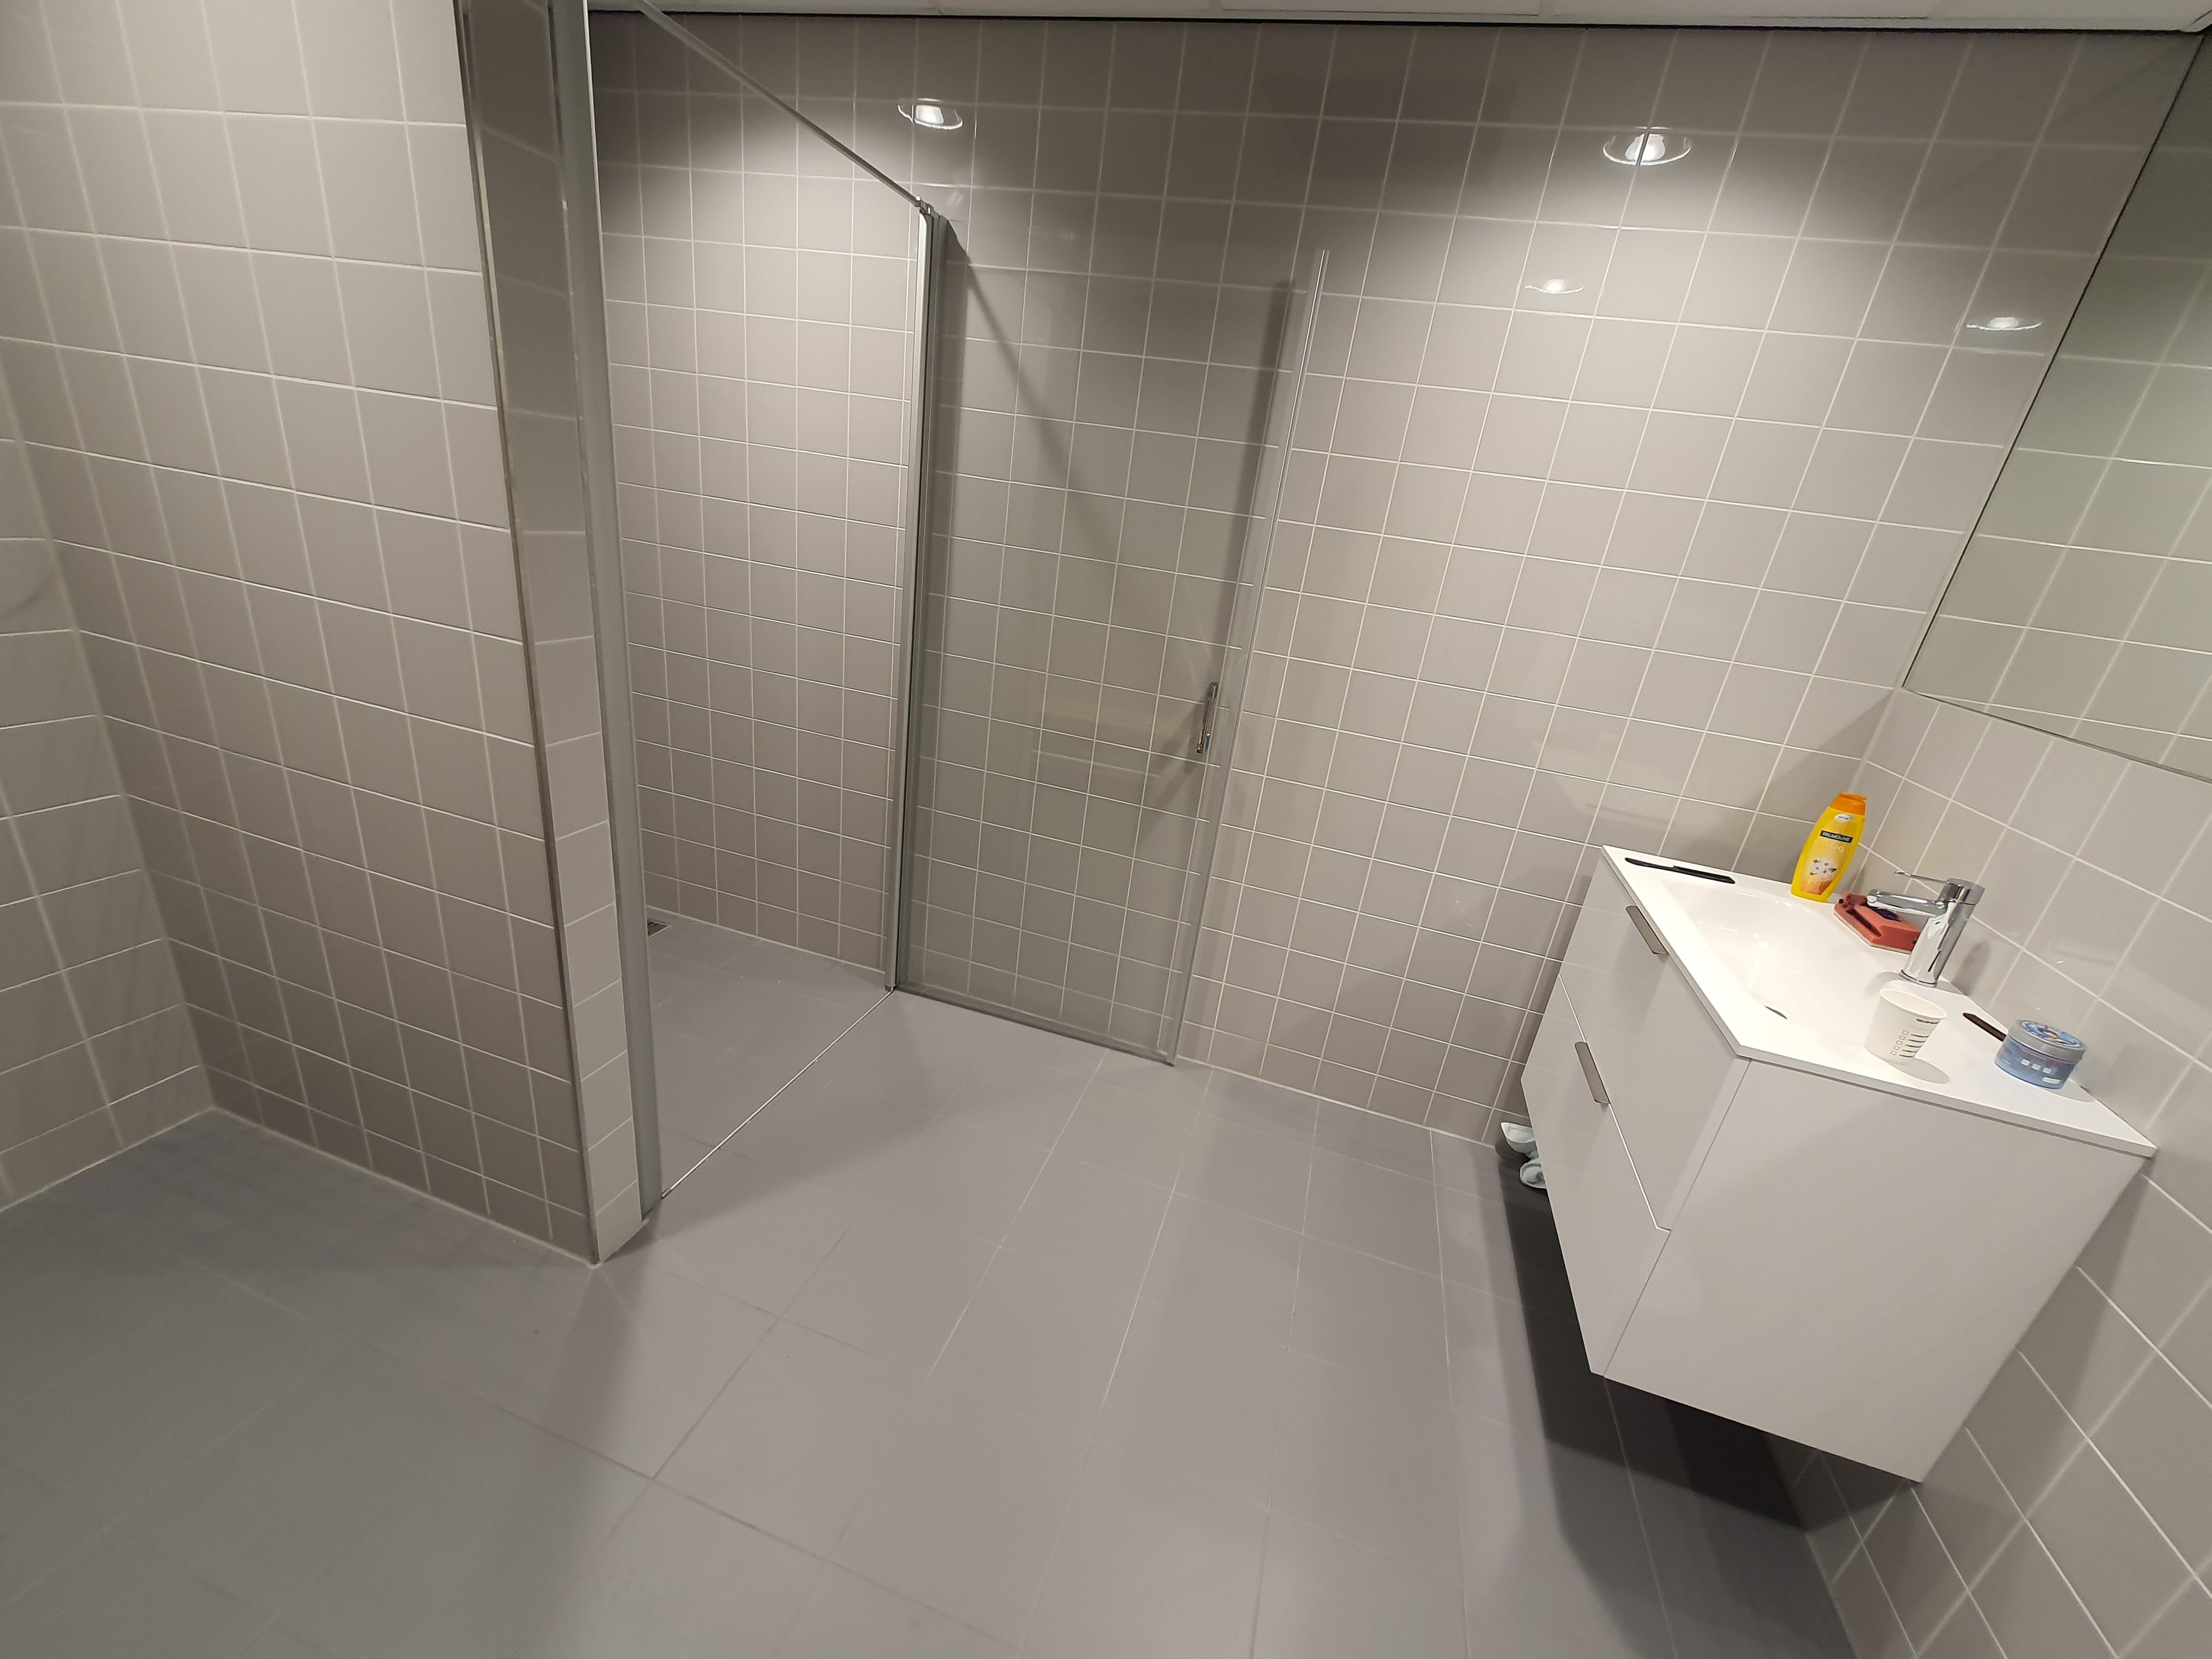
Shower
There is a shower available if the participant wishes to clean their hair after the experiment. It is next to the EEG lab (officially: MF-B447-D), on the right side:
Multicubicles
Virtual Reality (VR)
In the Multicubicles (A-429 and A-435), you can do all sorts of experiments that require a larger space. These rooms are flexible in use. An example of their use is Virtual Reality.
These rooms need to be booked. You can find instructions for booking rooms here. [INSERT LAB BOOKING INSTRUCTIONS]
Useful Documents
Stimuli Luminance
You can measure the luminance values of your stimuli using the SpyderX Pro colorimeter which can be found in the storage cupboard in MF-B447. Follow the steps below to measure the luminance:
-
Open DisplayCAL on the stimulus monitor.
-
Plug the SpyderX Pro colorimeter in the participant monitor (you might have to unplug e.g. the keyboard to make space), and turn the light on in the experimental room on the same brightness as you would during the experiment.
-
Check whether DisplayCAL is using the correct ArgyllCMS. You do this by going to "?" and then "About...". You should see ArgyllCMS 3.5.0.
-
If you do NOT see that, then go to "File" -> "Locate ArgyllCMS executables..." -> navigate to
C:\Program Files (x86)\DisplayCAL\Argyll_V3.5.0\bin-> Press “Select Folder”. Now it should be the correct one (check again)!
-
-
In DisplayCAL the SpyderX will already be selected. Check that the 'Mode' is on "LCD White LED" and that the correct 'Display' is selected (ROG XG258/PG258Q = Researcher, XG248Q = Participant).
-
If you cannot select the participant display (XG248Q), then go to Display Settings -> press on the button next to “identify” on the top of your screen -> select "extend these displays"-> in DisplayCAL you should now be able to select the correct monitor.
-
-
Click on the button "Calibrate & profile" at the bottom of the screen.
-
Press on "start measurement". It will ask you to put the light-tight cap on the instrument for self-calibration. Press "ok".
-
You will now see the pop-up to place the instrument on the test window. Remove the light-tight cap and place the colorimeter (with the camera-side) on the grey box (you can enlarge it).
-
Keep the colorimeter on the box (keep pressure against the screen during the
measurement with a chinrest for example), click on "ok" and afterwards (after the pop-up left) click on "Start measurement".
-
The box will turn white, and values will appear. You can now move the colorimeter to face the stimulus you
want to measure. When the value for "Current" is stable click on "Stop measurement" to freeze the luminance values.